Recipe: Cinnamon Roasted Almonds

IMG_8179

Nuts are the quintessential portable snack with plenty of nutrients, good fats, fiber and staying power to hold you over ’til that next meal. When I’m in  training mode they’re a great option for keeping my energy up between workouts, but now that I’m training for two, so to speak, they’re a full-blown necessity for those moments when that panicked I-NEED-TO-EAT-NOW feeling hits.

Sometimes they need a little spicing up, though — particularly when we’re on the cusp of fall, and my thoughts are drifting toward cooler days filled with cider, pumpkins, apples and all kinds of comfort food. So after I devoured a packaged of the store-bought variety, I figured it was time to take matters into my own hands and make an all-natural version at home.

And bonus: It makes your entire house smell delicious!

Cinnamon Roasted Almonds

(adapted from Taste of Home)

Ingredients: 

  • 1 egg white
  • 3 teaspoons vanilla extract
  • 2 cups unblanched almonds
  • 1/6 cup sugar
  • 1/6 cup packed brown sugar
  • 1/2 teaspoon salt
  • 1 teaspoon ground cinnamon

Directions: 

  1. In large bowl, beat egg white until frothy; beat in vanilla. Fold in almonds; stir to coat.
  2. Combine sugars, salt and cinnamon in separate bowl; add to nut mixture and stir to coat.
  3. Spread evenly into a baking sheet lined with parchment paper. Bake at 300° for 25-30 minutes or until almonds are crisp, stirring once.
  4. Cool, and store in an airtight container. Yields about 2 cups.
What are you looking forward to this fall?

Recipe: Nutella Banana Protein Oatmeal

IMG_8439

Stuck in a breakfast rut? Yeah…me, too.

As much as I love my usual yogurt/granola/fruit or whatever egg frittata we whip up over the weekend, sometimes my taste buds need a little variety. If I’m being really honest, once in a while they also need something sweet. 

And when I want to venture into dessert-for-breakfast territory without totally throwing my system into sugar shock before 7 a.m., I experiment with oatmeal. With all the fixings, of course.

But where to start? Well, my lovely friend Corey, an RN and Arbonne Executive District Manager, knows I’m a supplement fan. So when a box of her very favorite Arbonne nutrition goodies arrived at my doorstep recently, I couldn’t wait to give the Chocolate Protein Shake Mix a whirl.

Not only does a serving of this stuff provide 20 grams of vegan protein (plus 20+ essential vitamins and minerals), but it’s also clinically tested and certified to have a low glycemic index, which has little effect on blood sugar levels and does not cause a spike in blood sugar.

A cure for my early-morning chocolate craving? Check. But one that won’t send me hurtling toward an energy crash? Yup. Let’s do this! 

Nutella Banana Protein Oatmeal

Ingredients:

  • 1 package plain, unsweetened instant oatmeal
  • 1/2 cup hot water
  • 1/4 cup oat cereal (I used this one from Bob’s Red Mill)
  • 1 tsp chia seeds
  • 1 Tbsp wheat germ
  • 1/2 oz chopped hazelnuts
  • 1-2 Tbsp Nutella
  • 1/2 banana, sliced
  • 1 scoop chocolate protein powder (I used Arbonne’s)
  • 1/4 cup 2% milk

Directions:

  1. In a bowl, mix the instant oats and hot water according to the directions on the package.
  2. Add oat cereal, chia seeds, wheat germ, hazelnuts, Nutella, banana and protein powder. Mix well to incorporate.
  3. Stir in milk (add more, as desired, to get consistency you like), and microwave for 30 seconds. Enjoy!
How do you get out of the dreaded ‘breakfast rut?’

Recipe: Fully-Loaded Zucchini Banana Bread

IMG_8113

Ever have a moment when you see a shot of a baked good, and it looks so tantalizing that it literally stops you in your tracks?

Ok, maybe that’s just me. 

When blogger friend Carleeh Mulholland posted pics from her recent Banana Zucchini Chia Bread baking session, I suddenly found myself at the grocery store on my lunch break to gather the ingredients.

She had tweaked the original recipe, doubling it, along with adding a cup of zucchini, 1/4 cup of chia and a extra banana for oomph. I figured I could take it a step further by taking out some of the sugar, playing with some “healthier” flours and packing in some more fiber with wheat germ.

The result speaks — or rather, shows, in the image above — for itself: a super-moist, super delicious bread that had hubby sneaking seconds (and thirds!) as a late-night snack.

Loaded Zucchini Banana Bread

(adapted from LittleBitsOf.com & special thanks to Carleeh for the heads up!)

Ingredients:

  • 2 eggs
  • 1 cup sugar
  • 1/4 cup agave nectar
  • 2 teaspoons vanilla
  • 1 cup unsalted butter, at room temperature
  • 1 cup buttermilk
  • 4 overripe bananas, mashed
  • 1 small zucchini, finely grated
  • 2 cups wheat flour
  • 1/2 cup coconut flour
  • 1/2 cup all-purpose flour
  • 1 teaspoon salt
  • 1 teaspoon baking soda
  • 2 teaspoons baking powder
  • 2 teaspoons cinnamon
  • 1/4 cup wheat germ

Directions:

  1. In a large bowl, beat together the egg, sugar, agave nectar and vanilla until combined. Add the butter and beat until smooth and the butter is fully incorporated. Beat in the buttermilk, bananas and zucchini.
  2. In a separate bowl, mix together the flours, salt, baking soda, baking powder, cinnamon and wheat germ. Slowly stir the dry ingredients into the wet until all the flour is incorporated.
  3. Spray two loaf pans with non-stick spray, and pour half of the batter in each.
  4. Bake in a pre-heated 350 degree oven for about 60 minutes or until a toothpick comes out clean.
How do you sneak healthy ingredients into your favorite recipes?

Recipe: Green Bean Salad with Seared Pineapple and Shrimp

IMG_7898

Sick of the same old same old when it comes to summer dinners? Spice things up a bit with this Sriracha-spiked salad.

I spotted this recipe in the July issue of O Magazine, and since it’s A) not too heavy on ingredients, B) chock full o’ nutrients, and C) ready in practically no time, it’s been what’s for dinner. Especially on weeknights when we’re pressed for time and creative meal ideas!

And, no, it’s not as spicy as you’d think. I’m not one for set-your-mouth-on-fire heat, but I love me some Sriracha; this recipe is more about flavor, though, than pushing the limits of your palate.

Green Bean Salad with Seared Pineapple and Shrimp

(courtesy of Marcia Kiesel via O Magazine)

Ingredients: 

  • ¾ tsp. plus ⅛ tsp. salt, divided
  • 1 pound green beans, trimmed
  • 3 Tbsp. vegetable oil, divided
  • 1½ cups 1″ pineapple chunks
  • ½ pound large shrimp, peeled and deveined
  • 3 garlic cloves, minced
  • 1 cup halved cherry tomatoes, divided
  • 2 Tbsp. Worcestershire sauce
  • 1 Tbsp. white wine vinegar
  • 1½ tsp. Sriracha

Directions:

  1. Bring a large nonstick skillet of water to a boil. Add ½ tsp. salt and green beans, and cook until just tender, about 4 minutes. Drain and spread out on a baking sheet to cool.
  2. In the dry skillet, heat ½ Tbsp. vegetable oil on high heat until shimmering. Add pineapple chunks in a single layer. Cook until browned on the bottom, about 30 seconds. Transfer to a large bowl.
  3. Add ½ Tbsp. oil to skillet. When hot, add shrimp, and season with ⅛ tsp. salt. Reduce heat to medium and cook, stirring a few times, until shrimp is just cooked, about 1 to 2 minutes. Transfer to bowl with pineapple.
  4. To skillet, add 2 Tbsp. oil and add garlic. Cook until golden brown, about 1 minute. Add ½ cup tomatoes and cook 1 minute, crushing with a spoon to release juices. Add Worcestershire sauce, vinegar and Sriracha and stir well. Remove from heat and season with ¼ tsp. salt.
  5. To bowl, add reserved beans and the additional ½ cup tomatoes. Pour warm tomato-Worcestershire mixture on top and toss well. Serve at room temperature or slightly chilled.

Are you on Team Sriracha — yay or nay? 

My favorite life-changing kitchen hack

c595e8c0ebcb5003204b84ec9f2fcc7d

Ok, that title is a bit dramatic. But for someone who eats — on average — an avocado a day, it’s become imperative to find an easier way to prepare these slippery little suckers.

Previously, I’d cut them in half lengthwise and clumsily attempt to peel the skin away on each side only to have it disintegrate into hand-held guacamole. Or I’d cut them in half and scoop out the flesh, but that’s not really an option if you’re looking for pretty avocado slices or dices.

Enter this genius little kitchen hack. Total game changer!

First, use a sharp knife to carefully cut a ripe avocado in half, lengthwise. You’ll have to rotate it as you go because you can’t cut through the pit, and then gently twist to get the two halves apart.

IMG_7237

Next, remove the pit by striking it with the heel of the knife until the blade goes about 1/4 into it. Carefully twist the knife to remove the pit.

IMG_7238

After that, slice each half lengthwise again. Now you’ve got it cleanly quartered and are ready to strip the skin.

IMG_7239

No more fumbling around, though. If the avocado is ripe enough, the whole piece will come off in one fell swoop. Voilà!

IMG_7240

Now you’ve got some gorgeous avocado to use however you choose. My favorites are in salads to add good fats, on sandwiches in place of mayo and in good ol’ guacamole…with tortilla chips and salsa, of course.

IMG_7241

What’s your tried-and-true kitchen hack?

Recipe: Thai-Style Noodle Salad

IMG_7234

As we creep toward our one-year anniversary of living in Oregon, we’re headed for a season of record-breaking temperatures. Not that I’m complaining. It’s going to take a lot more humidity to scare this Midwesterner who’s also lived through a few sweltering East Coast summers.

If I’ve noticed one thing, however, it’s that my desire to eat warm foods is inversely proportional to the number on the thermometer. So hot summer days call for a cold, protein-packed salad — and this one’s something I whipped up on a weeknight utilizing ingredients we already had on hand.

Because, if we’re being honest here, my willingness to hit the grocery store also plummets as the heat rises… 

Thai-Style Noodle Salad

Ingredients: 

Salad:

  • 1 package black bean pasta, cooked al dente
  • 1 bag matchstick carrots (approx. 2 cups)
  • 2 cups grilled chicken, diced
  • 1 bell pepper, chopped
  • 2 stalks celery, halved lengthwise & chopped
  • 1/2 cup red onion, minced
  • 1 cup cilantro, chopped
  • 1 bunch green onion, chopped
  • 1 small container roasted peanuts

Sauce:

  • 2 cups all-natural peanut butter
  • 1/2 cup sweet chili sauce
  • 1 tsp lime juice
  • 1 TBSP fish sauce
  • 1 TBSP ginger (minced or paste)
  • Dash of salt

Directions: 

  1. Once pasta is cooked and cooled, place all salad ingredients in a large bowl.
  2. In a small bowl, mix together all sauce ingredients.
  3. Pour sauce over salad, and toss to coat evenly.
  4. Serve immediately (with a sprinkle of peanuts), or refrigerate for an hour if you want to eat it cold.

Not only is the black bean pasta gluten-free, but it’s also a terrific source of protein — there’s a whopping 25 grams of protein and 12 grams of fiber in every serving!

IMG_7231

This salad is super-versatile, too; I’d serve atop leafy greens for a more nutrient-dense main dish or as a side salad to accompany a meaty entree on nights when I’m looking for more protein.

IMG_7232

Do you adjust your kitchen habits with the weather?

Recipe: Zest Nutrition Avocado Chocolate Mousse

IMG_7187

Usually when I see the words “gluten-free, egg-free, dairy-free and vegan” to describe a recipe, I brace myself for the worst. But, once again, my friends over at Zest Nutrition have managed to create a super-healthy treat that’s incredibly tasty.

This silky avocado chocolate mousse comes from the kitchen of co-founder Anna Rosinoff, who grew up with “chocolate o’ clock” as a time-honored tradition in her family. So when she’s not applying her expertise in counseling and health promotion to develop workplace wellness programs, Anna’s brainstorming delicious ways to incorporate her favorite sweet into wholesome, nourishing recipes.

Don’t let the avocado throw you for a loop; with no refined sugars, un-pronouncable ingredients or bad fats, this dessert will pass a taste test from even the most discerning chocolate connoisseurs!

Zest Nutrition’s Avocado Chocolate Mousse

Ingredients: 

  • 1/2 avocado
  • 1 very large, very ripe banana
  • 1/2 cup unsweetened powdered baking chocolate
  • 2 TBSP vanilla extract
  • 1/2 cup agave nectar or honey

Directions: 

  1. Combine all ingredients in food processor.
  2. Blend until smooth.
  3. Enjoy immediately, or chill in fridge for around 30 minutes.

Since Ben and I have a, ahem, healthy appreciation for chocolate, I thought it’d be best to start with a double batch of mousse.

IMG_7181

My bananas were just starting to ripen up, so next time I’ll look for some with spots to make sure they’re softer and sweeter.

IMG_7183

Next comes the cocoa and vanilla — and I used a little less than a cup of agave since it’s pretty potent.

IMG_7184

After the initial blend, scrape the sides of the food processor and blend again until there are no more lumps.

IMG_7185

It’s got a lovely pudding-like consistency, and there’s a subtle hint of banana, but you can’t even taste the avocado.

IMG_7186

Eat it plain, or top with nuts, berries or something crunchy if you want to break up the smooth texture (I opted for unsweetened shredded coconut).

IMG_7190

Do you celebrate chocolate o’ clock in your house? 

Recipe: Zest Nutrition’s Lemon Yogurt Cream Pie

IMG_6502

When she’s not helping kiddos eat better by day as a registered dietitian or running around with Team LUNA Chix Portland Run on Monday evenings, Megan Fuetterer can often be found in her kitchen concocting some pretty amazing so-good-you-won’t-believe-they’re-actually-good-for-you recipes.

Case in point: this pumpkin pie, which landed her on the TODAY show in Joy Bauer’s “Too Good To Be Healthy” holiday pie competition.

Megan, along with her business partner Anna Rossinoff, founded Zest Nutrition, which is dedicated to helping women shed the guilt and overcome the struggle with food. Zest’s mission is to take a whole-foods approach to eating to support women in accomplishing health goals and truly loving their bodies, so they can spend less time in their heads and more time in their hearts.

This Lemon Yogurt Cream Pie that Megan created is one such example; she wanted a treat for breakfast one morning, so she whipped up something that’s sweetened with honey, nestled in a whole-wheat crust and packed with protein from a yogurt base. Go ahead, and indulge without guilt!

Zest Nutrition’s Lemon Yogurt Cream Pie

For the Crust

Ingredients:

  • 2 1/2 cups whole wheat flour
  • 1/2 tsp salt
  • 2/3 cup softened coconut oil
  • 1/4 cup cold water

Directions:

  1. Using a hand mixer, mix the flour, salt and oil together until you have good-looking crumbs.
  2. Add water and continue to mix. If your crust is too crumbly, continue to add water until you get the right consistency.
  3. Press crust into a the bottom and up the sides of a pie pan. You might have some leftover crust depending on how thin you make it.
  4. Bake your crust at 450F for 10 minutes. Let cool before adding pie filling.

For the Homemade Lemon Curd

Ingredients:

  • 3 eggs
  • Zest of 2 lemons
  • 1/4 cup coconut oil
  • 1/4 cup honey
  • 1/2 cup lemon juice

Directions:

  1. Mix together eggs, honey and lemon zest in a nonstick saucepan or pot.
  2. Heat over low heat, then add coconut oil and continue to stir.
  3. Once melted, stir in the lemon juice.
  4. Cook over low heat, stirring constantly for about 5 minutes until it thickens.
  5. Let cool before adding to pie filling.

For the Filling

Ingredients:

  • 2 cups Greek yogurt (Megan recommends 2%)
  • 1 1/2 cup homemade lemon curd (recipe above)
  • 1/4 cup honey
  • 1/2 tsp vanilla extract
  • 1 1/2 tsp powdered gelatin
  • 2 Tbsp water

Directions:

  1. Mix together yogurt, lemon curd, honey and vanilla.
  2. Put the water and gelatin in a microwave safe bowl and let sit for 5 minutes. Then microwave for 10 seconds until gelatin is dissolved and immediately whisk the hot gelatin into yogurt mixture.
  3. Pour into pie crust, cover with aluminum foil and refrigerate for at least 6 hours to allow pie to set up.
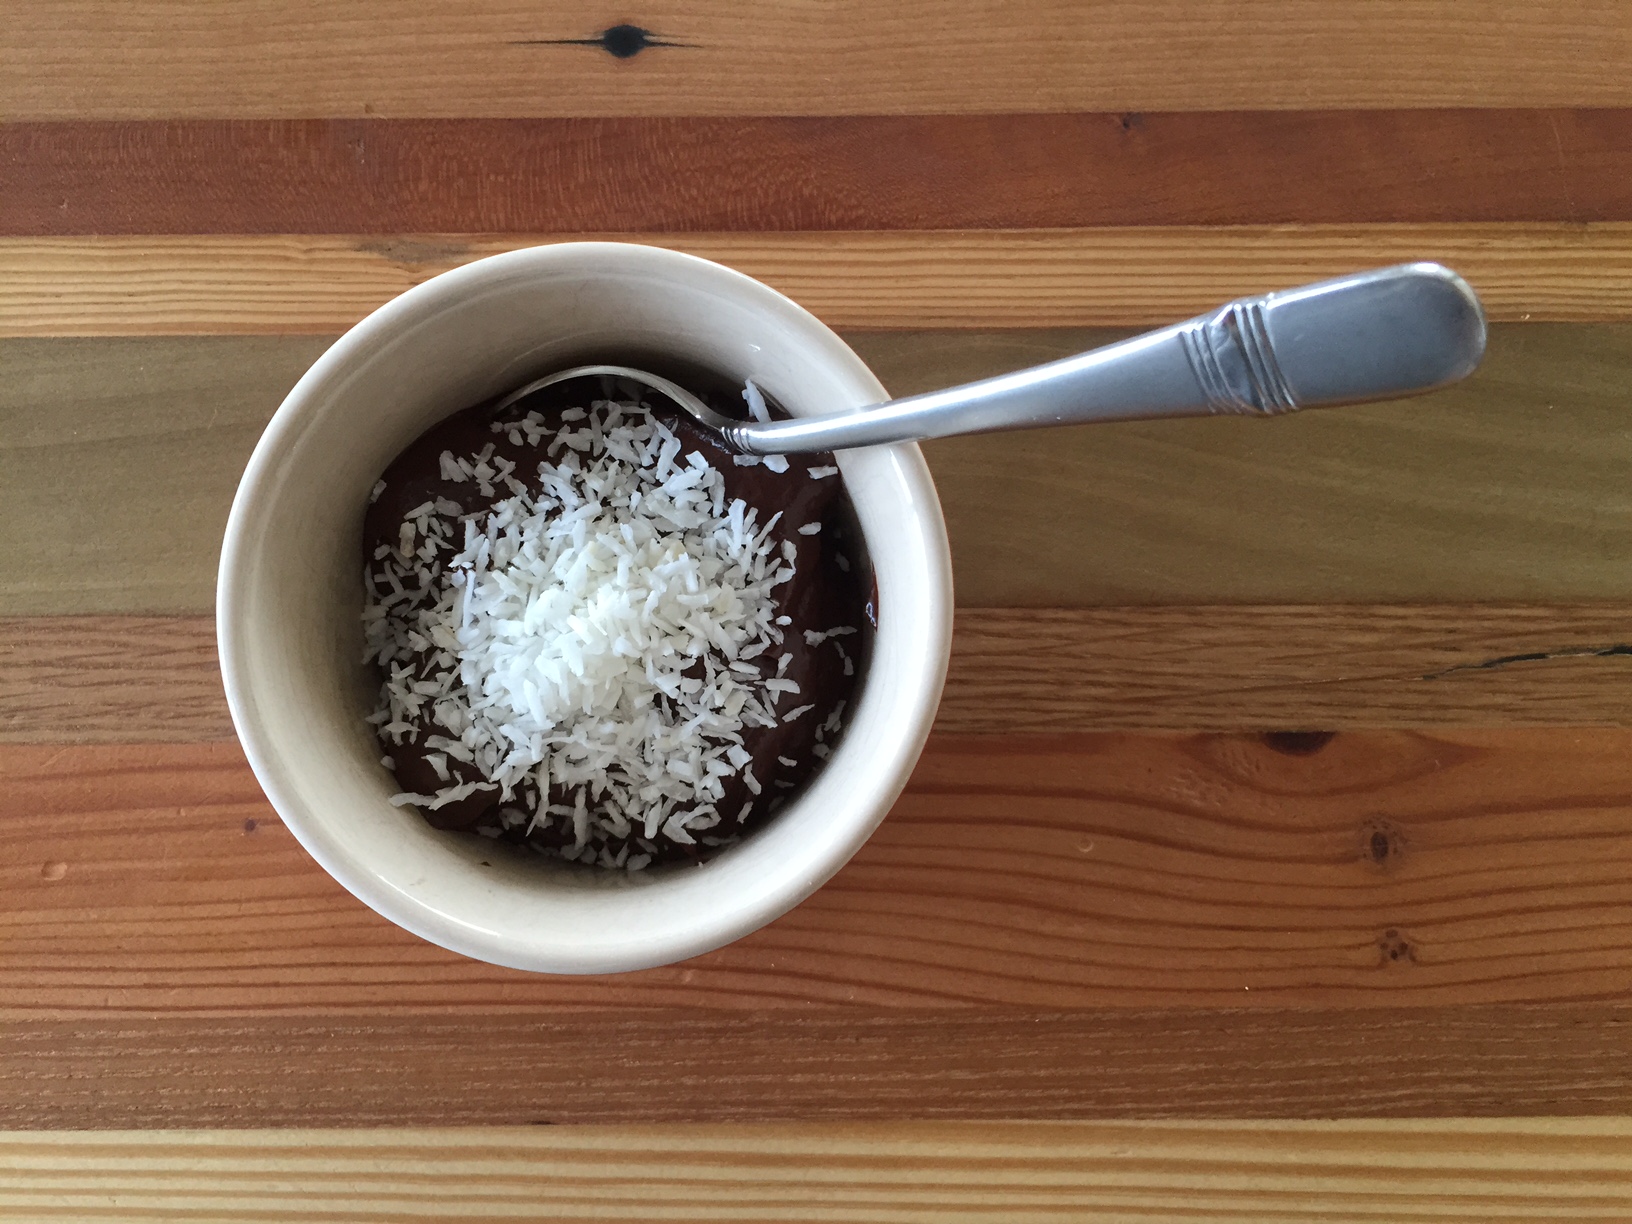
  4. Add any toppings or garnish as desired…enjoy!

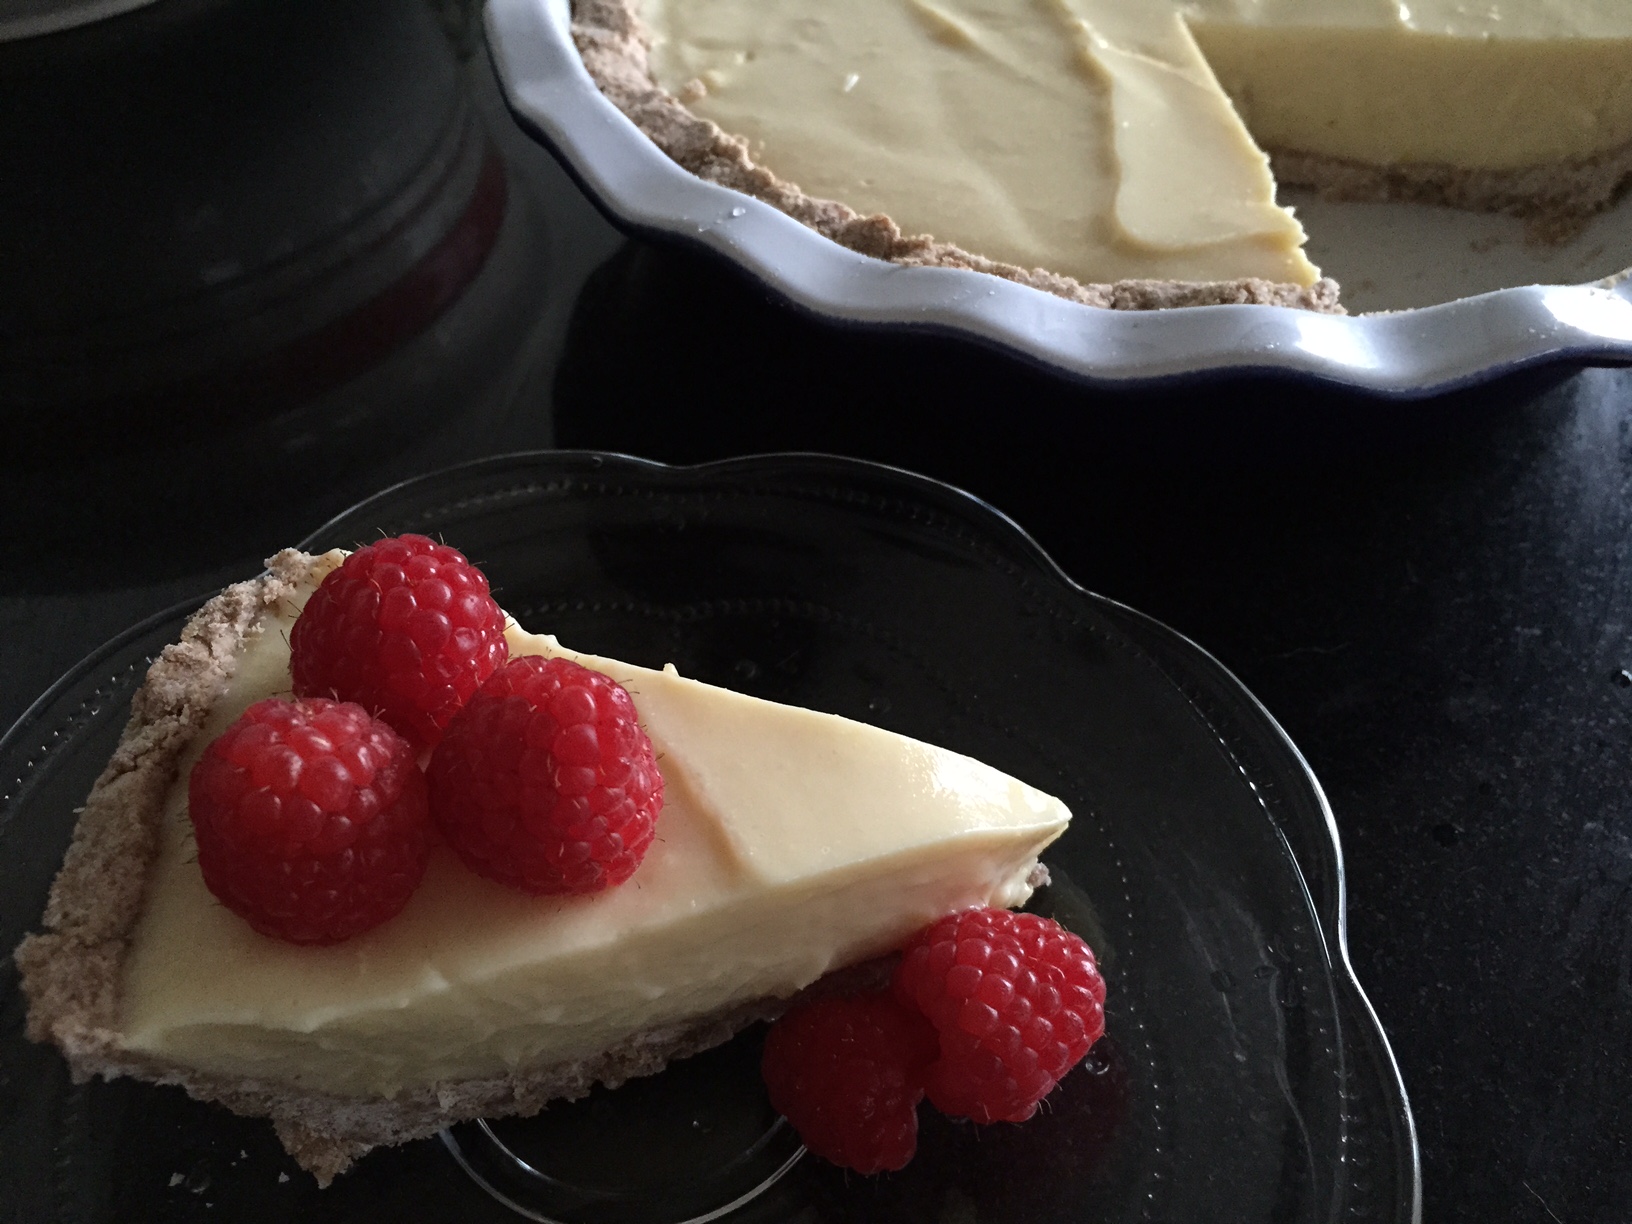
Megan’s secret to making this pie pop is the addition of homemade lemon curd, which is actually much easier to make that you’d think (I even added a few key limes we had on hand to give it extra zip).

IMG_6500

Ben and I couldn’t wait the full six hours for the pie to set, so we dove in after about four, topping it with fresh berries and devouring it as dessert.

IMG_6505

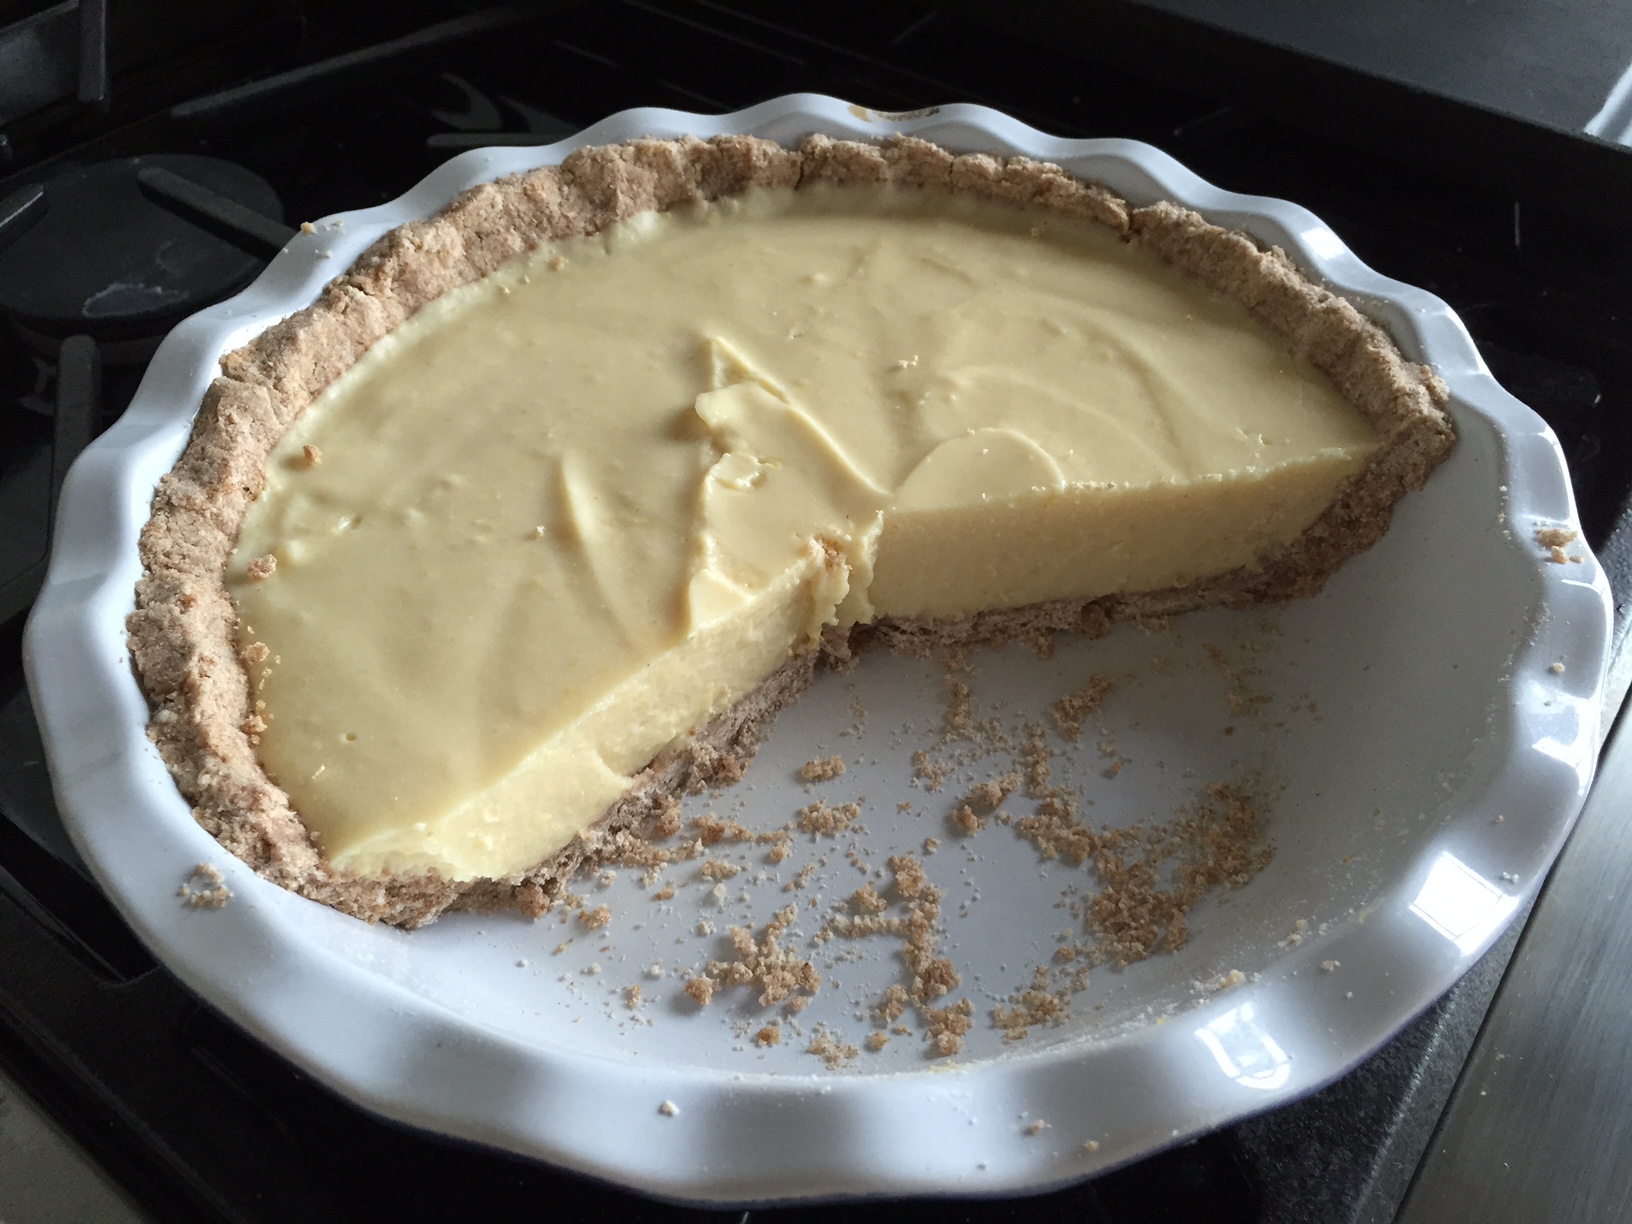
Of course, by morning it was even better — not only did the filling fully set, but the lemon-lime flavor also mellowed out a tad. Start your morning off with a slice and a cup of coffee, and you’re pretty much guaranteed a good day!

IMG_6509

Pie for breakfast: Yay or nay? 

Recipe: Coconut Flour Chocolate Chunk Bars

IMG_5993

Finally — a no-fail coconut flour recipe!

I could wax poetic about how these bars are low in carbs, high in fiber, gluten-free (depending on the chocolate), blah blah blah…but all you need to know its that — holy crap — they’re good. And not too bad for you.

Next time you have a hankering for chocolate chip cookies, this isn’t just a healthier substitute; it’s about to become your new go-to recipe for chewy, cakey, chocolatey bars with that perfect balance of sweet-and-salty, thanks to a sprinkle of sea salt on top.

Coconut Flour Chocolate Chunk Bars

Courtesy of Ambitious Kitchen

Ingredients: 

  • 1/4 cup melted coconut oil
  • 1/3 cup honey, agave nectar or maple syrup
  • 2 teaspoons vanilla extract
  • 2 eggs, slightly beaten
  • ¼ cup unsweetened almond milk (I used cashew)
  • 1/2 cup coconut flour
  • ½ teaspoon baking soda
  • ¼ teaspoon salt
  • 3 oz your favorite dairy free dark chocolate bar, coarsely chopped
  • 1/2 cup coconut flakes, optional

Directions: 

  1. Preheat oven to 350 degrees. Spray 8×8 inch baking pan with nonstick cooking spray.
  2. In a large bowl, whisk together coconut oil, honey, vanilla, eggs, and almond milk. In a separate medium bowl whisk together coconut flour, baking soda and salt.
  3. Add dry ingredients to wet ingredients and mix until just combined and batter is smooth. Fold in chopped chocolate, reserving a few tablespoons for sprinkling on top, if desired.
  4. Bake for 20-22 minutes (mine took closer to 26) or until edges are golden brown and knife comes out with a few crumbs attached. The batter may look like it’s not all the way cooked, but it will be. DO NOT OVERBAKE.
  5. Cool bars on a wire rack for at least 10 minutes so they settle a bit, then cut into 16 squares. Enjoy!

As mentioned above, I also sprinkled some sea salt on top before baking to offset the sweetness just slightly.

IMG_5990

Have you struck gold with a coconut flour recipe? 

Recipe: Running on Veggies’ No-Bake Almond Butter Cookies

IMG_5767

As much as I try to fill my diet with whole, nutrient-dense foods, all bets are off when it comes to cookies.

It was by pure chance, though, that I saw a pic of this no-bake version on American long-distance runner Kara Goucher‘s Twitter feed just as a craving hit for my usual Toll House recipe.

And, just my luck, I had all the ingredients available, so my baking took a healthier turn that day.

KaraTweet

Now, let’s be honest, there’s no substitute for the real-deal, mega-butter-and-sugar variety (in fact, these reminded me more of my raw coconut macaroons)…but if it’s a sweet treat that you’re after, this one won’t completely derail your diet.

And if it’s good enough to keep Kara fueled, it’s good enough for me!

No-Bake Almond Butter Cookies

(Makes 14-15 cookies; recipe courtesy of Running on Veggies)

Ingredients: 

  • 1 cup almond flour
  • 1/2 cup coconut flour
  • 4 tablespoons almond butter
  • 5 tablespoons unsweetened apple sauce
  • 3/4 cup almond milk
  • 1/4 cup of dates
  • 1/2 cup shredded coconut (optional)
  • 1/2 cup cacao nibs (or chocolate chips)
  • Optional add in: 41 grams (1 serving) of your favorite protein powder, be sure to add more liquid. Around 1 cup total of almond milk (1/4 cup extra)

Directions: 

  1. In a medium size mixing bowl combine almond flour, coconut flour and almond butter until well combined.
  2. Blend almond milk and dates until smooth.
  3. Add almond milk date mixture and the remaining ingredients into your flour and almond butter mixture.
  4. Line a baking sheet with parchment paper. Using a spoon, form little balls and press them down gently using a fork.
  5. Place in the freezer or eat them as-is! Store in an airtight container in the freezer. You can also let them thaw for a few minutes to get a softer cookie feel.

IMG_5763

How do you feel about healthy “baking” when it comes to curing those cravings?