Recipe: Thrive Energy Cookbook’s Peanut Curry Rice Bowl

photo 3 (3)

Loaded with veggies, this classically-flavored curry will knock your socks off. Hubby and I made it the other night, and even though it takes a little time to prepare, it’s totally worth it!

Thrive Energy Cookbook’s Peanut Curry Rice Bowl

Ingredients:

  • 1/4 cup virgin coconut oil
  • 2 cups finely-chopped sweet onion (I used red)
  • 1 cup peeled and diced carrots
  • 1 cup diced celery (forgot to get at the store, so didn’t use — oops!)
  • 2 tbsp pounded and thinly-sliced lemongrass
  • 1 tbsp minced garlic
  • 1 tbsp peeled and finely-chopped ginger
  • 2-3 tbsp yellow curry paste (our store didn’t have, so I used red curry paste)
  • 6-8 fresh or frozen lime leaves (again, not at store — so I substituted some lime zest)
  • 1 large sweet red pepper, diced
  • 1 large sweet green pepper, diced
  • 2 cups baby bok choy, chopped
  • 1 1/2 cups drained canned baby corn
  • 1/2 cup smooth natural peanut butter
  • 1 cup vegetable stock (I used chicken broth)
  • 4 cans coconut milk
  • 8-10 fresh Thai basil leaves, torn
  • 1 cup toasted peanuts, chopped
  • 2 tbsp cane sugar (I used 1/2 tsp agave nectar)
  • 1 cup whole grain brown rice, cooked
  • 1 cup bean sprouts (I omitted)
  • 4 small handfuls of pea shoots, for garnish
  • 4 small lime wedges, for garnish
  • Our addition: Chopped chicken (for extra protein!)

Directions: 

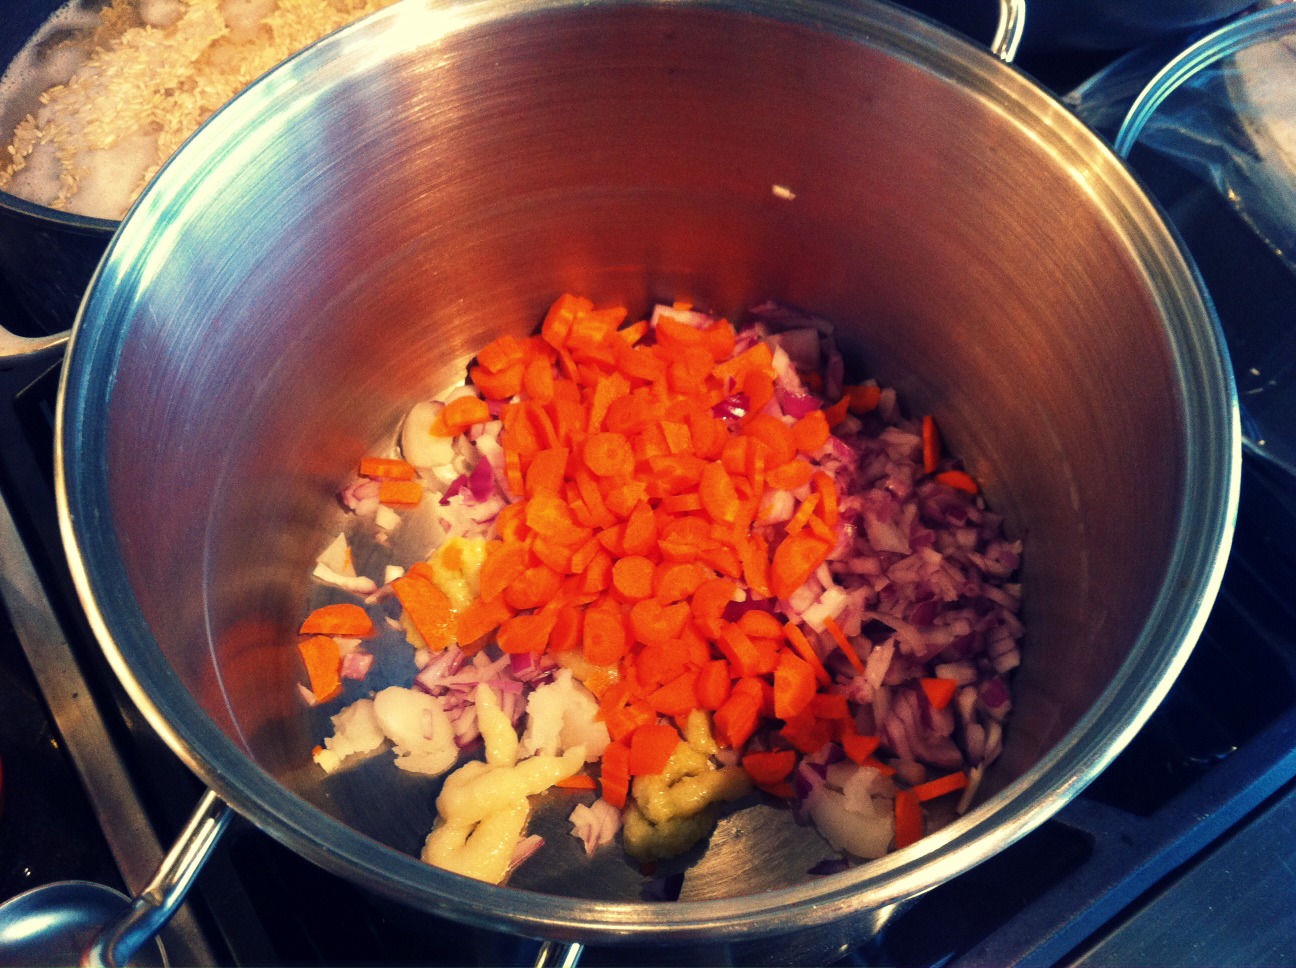
  1. In a large pot over medium heat, melt coconut oil. Add onions, carrots, celery, lemongrass, garlic and ginger; cook, stirring frequently for about 5 minutes.
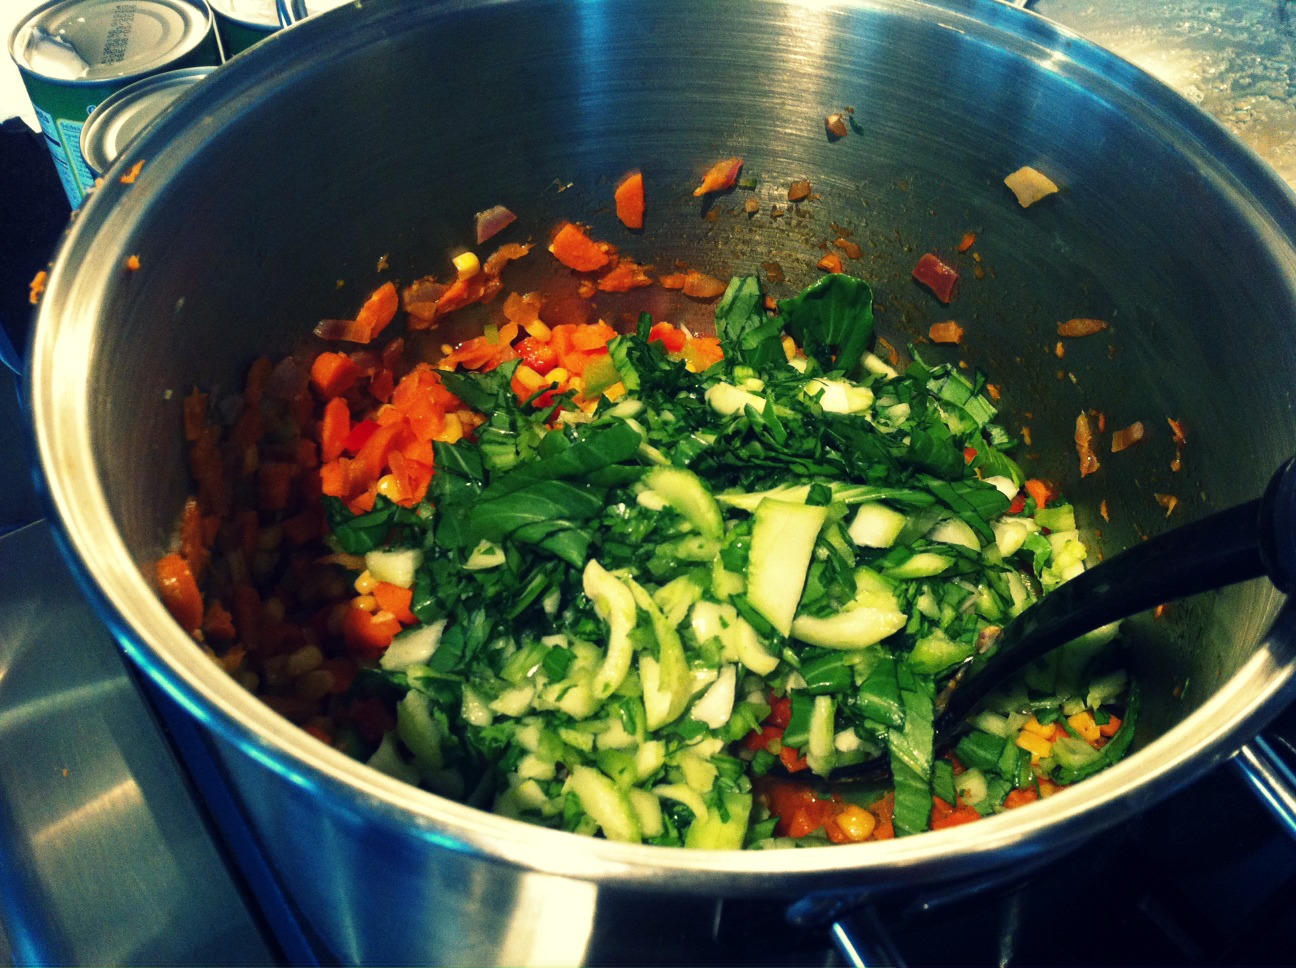
  2. Add curry paste and cook, stirring, until it melts and mixes with vegetables. Add lime leaves, red and green peppers, baby bok choy and corn. Cook for 3-4 minutes.
  3. Add peanut butter and cook, stirring, until melted and mixed in.
  4. Reduce heat to medium, then stir in stock and coconut milk. Add basil, half of peanuts and cane sugar. Bring to gentle simmer, stirring to blend in coconut milk, about 5 minutes (don’t boil or coconut milk may split).
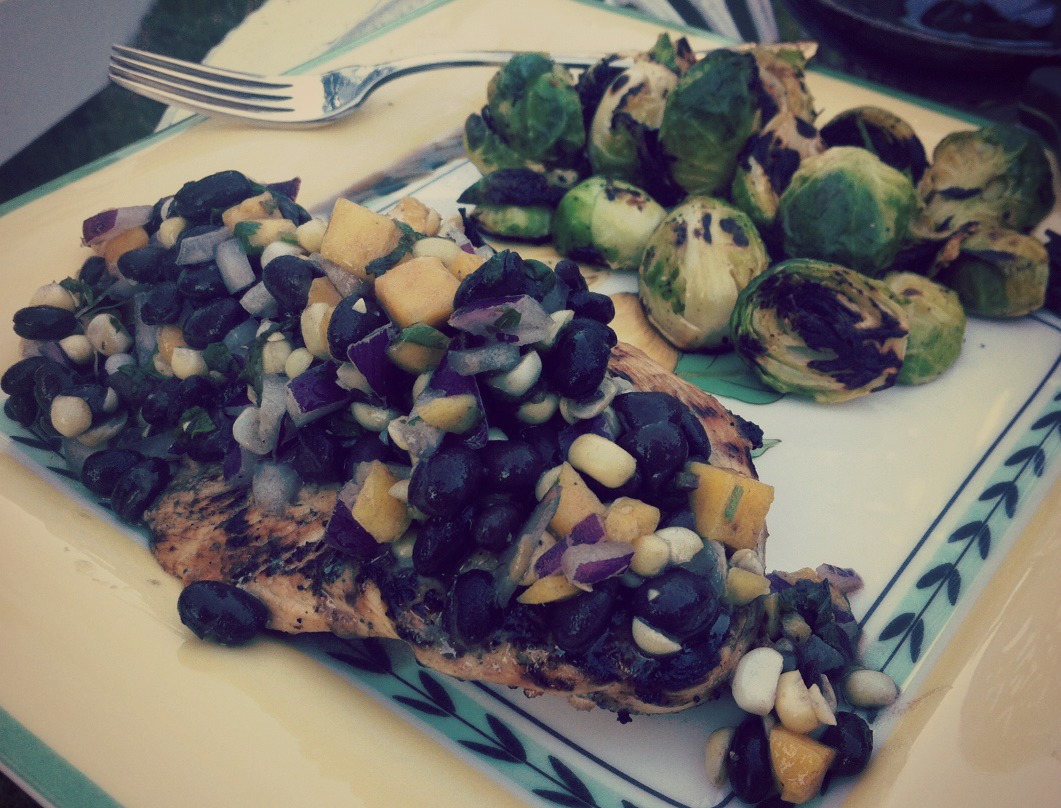
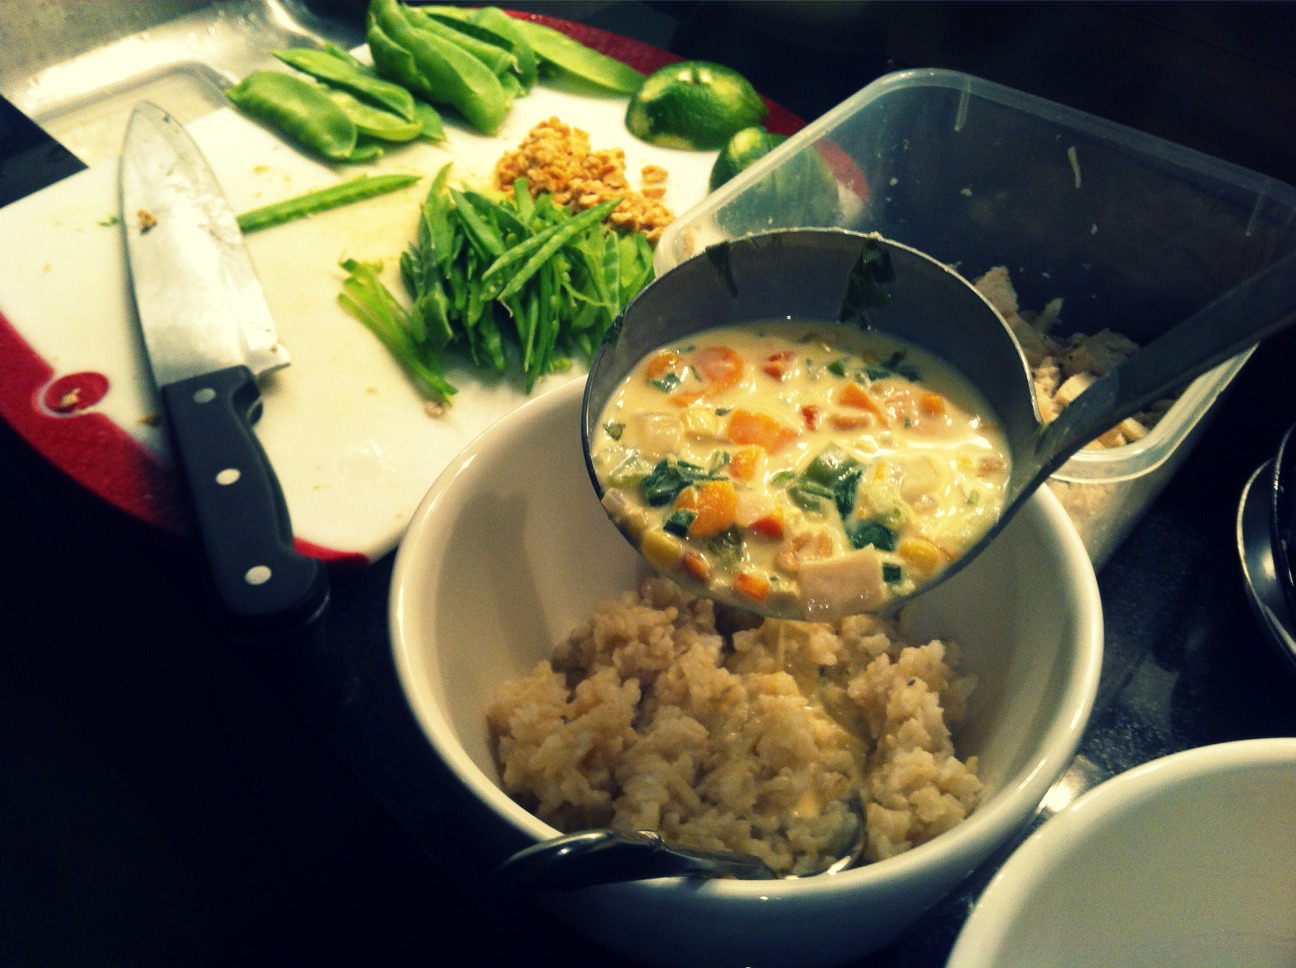
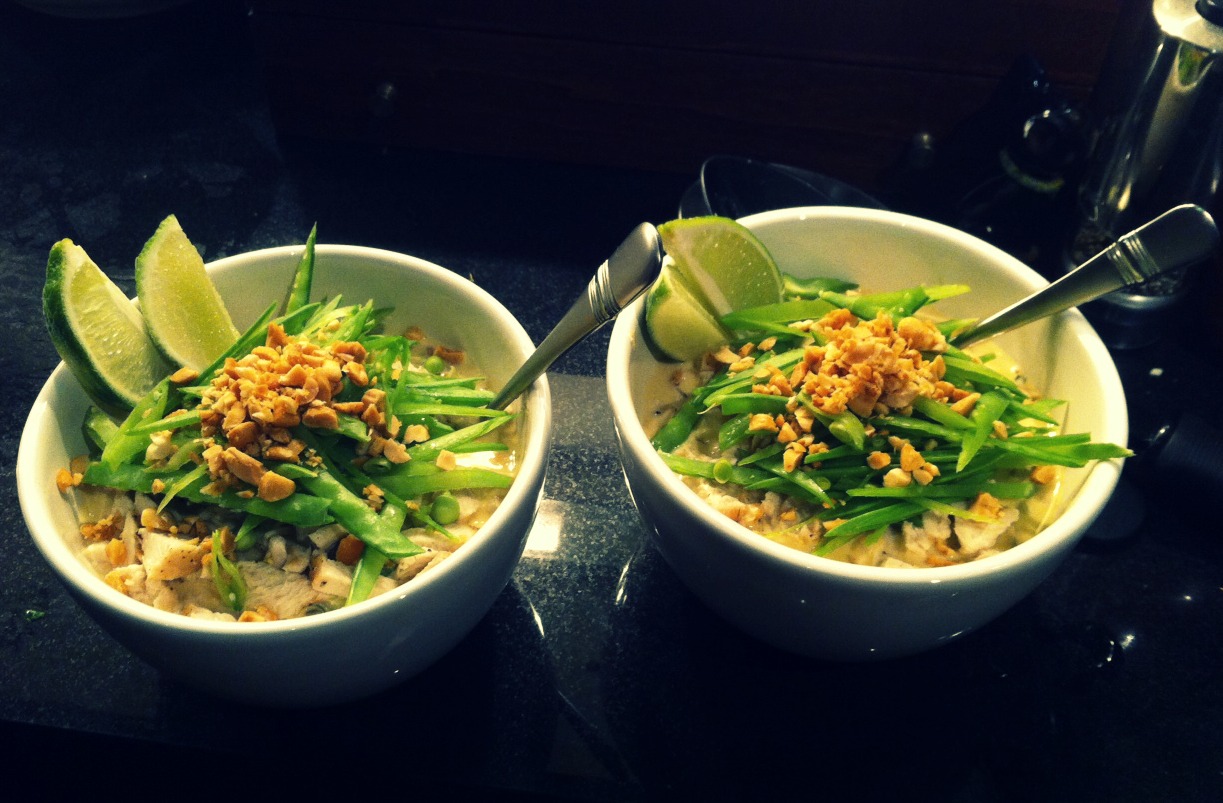
  5. Serve in large bowls over brown rice with bean sprouts layered on top. Garnish with pea shoots, toasted peanuts and lime wedges.

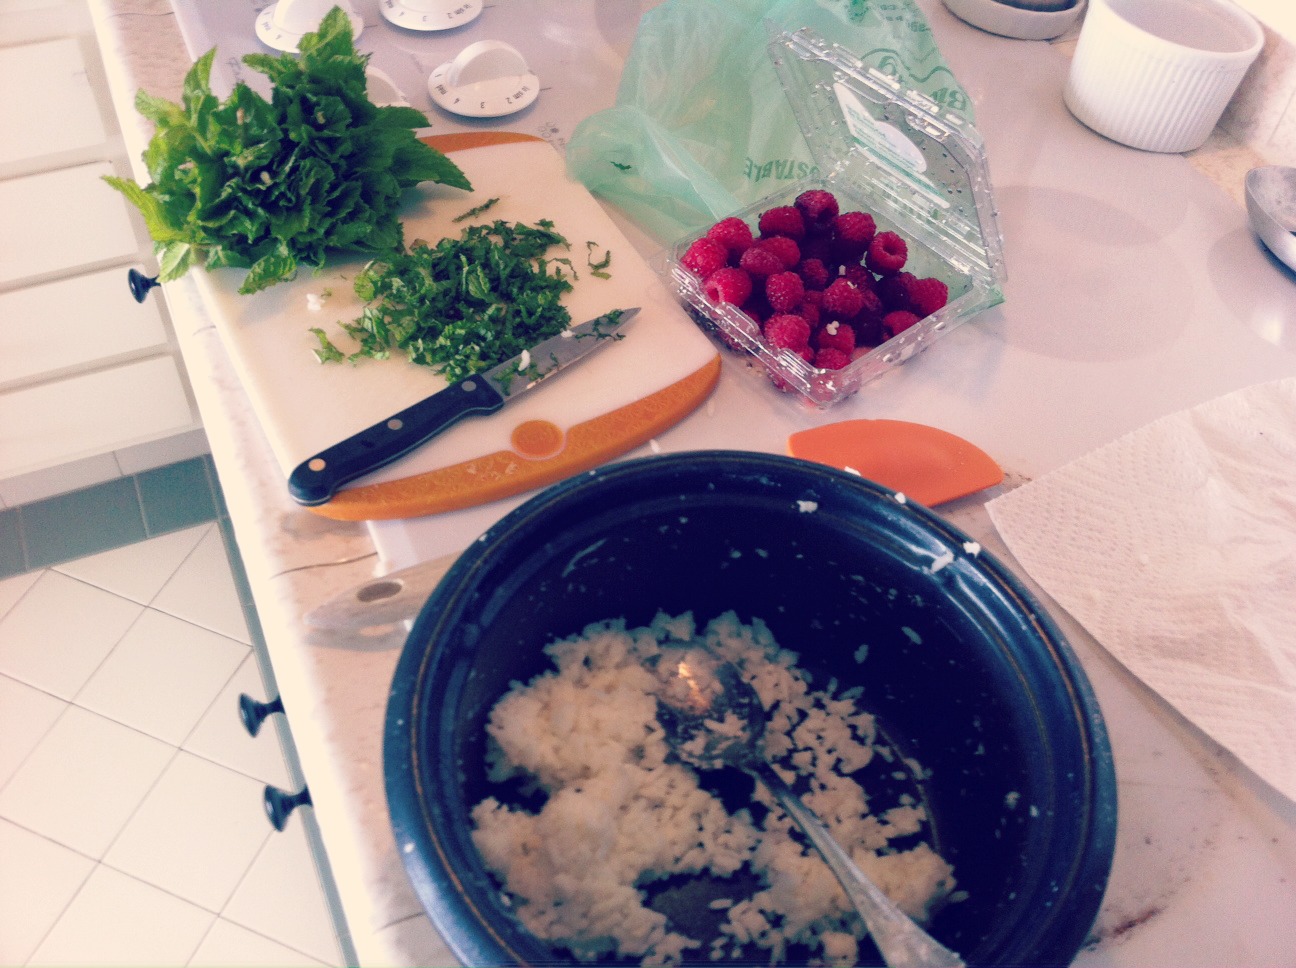
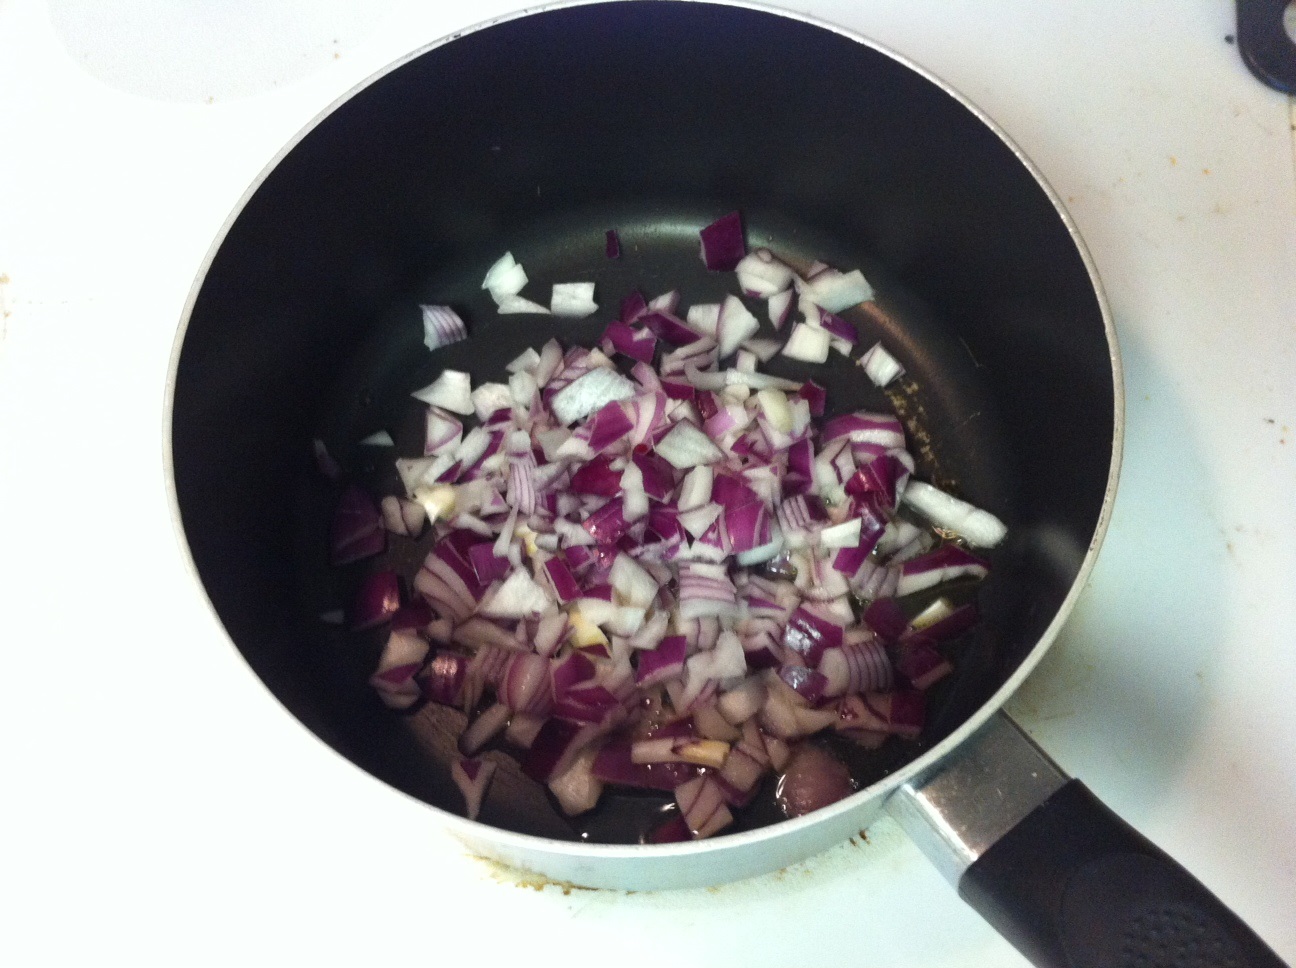
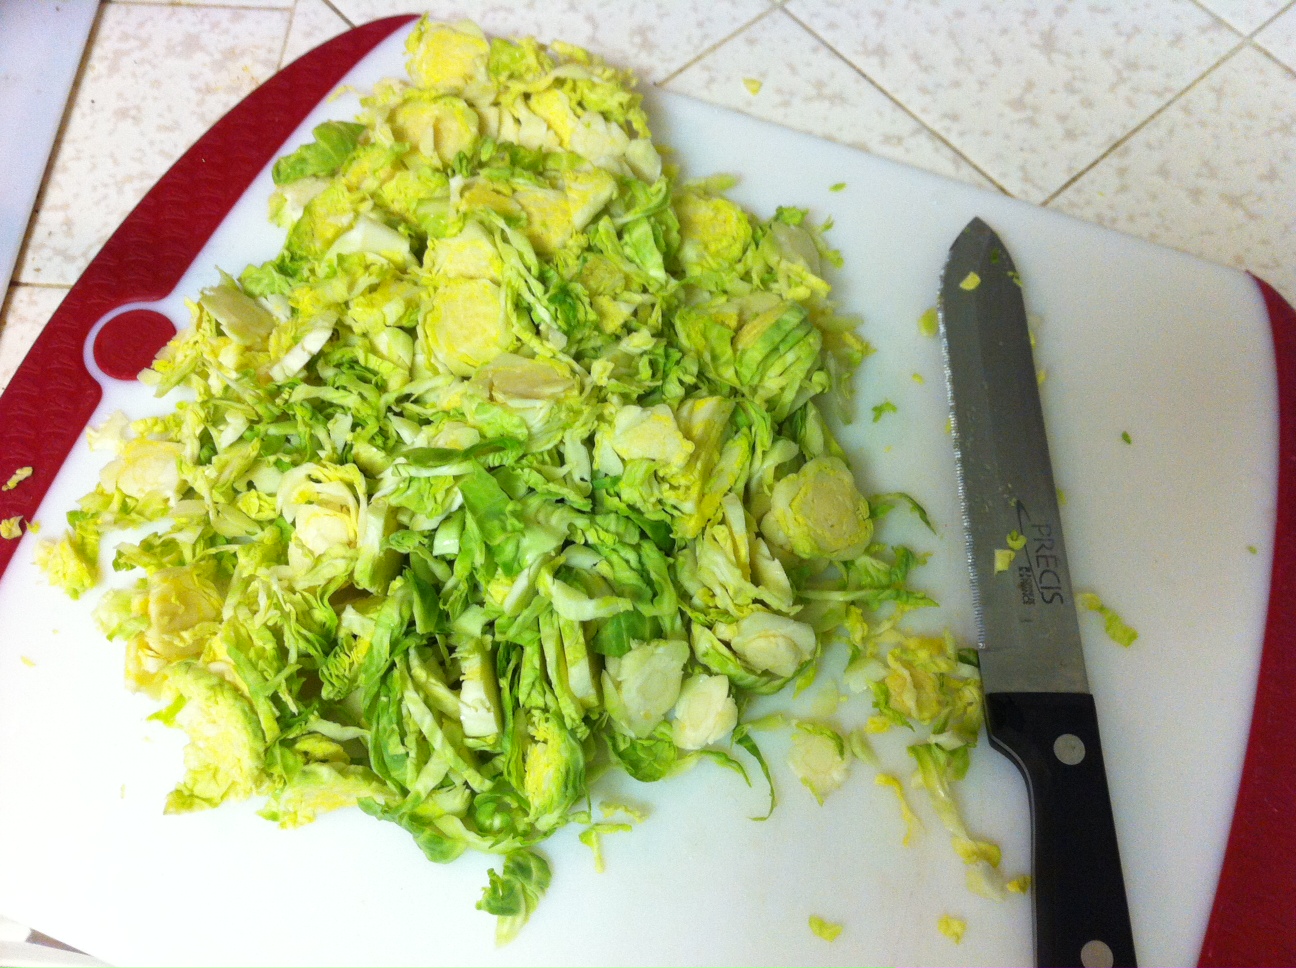
Here’s a look at the process: First, get chopping! Then add the coconut oil and veggies to your pot.

photo 1 (3)

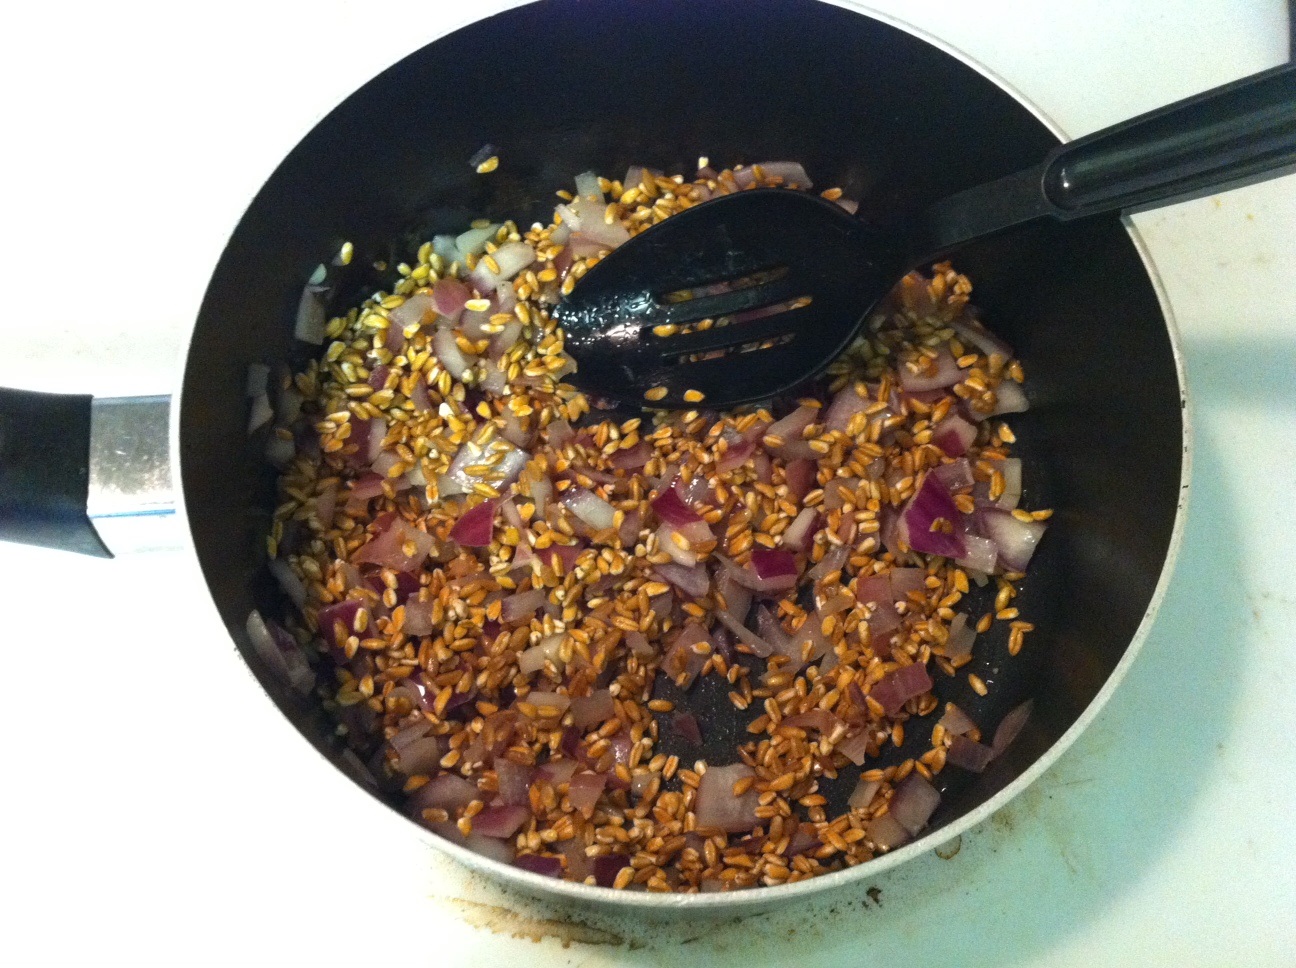
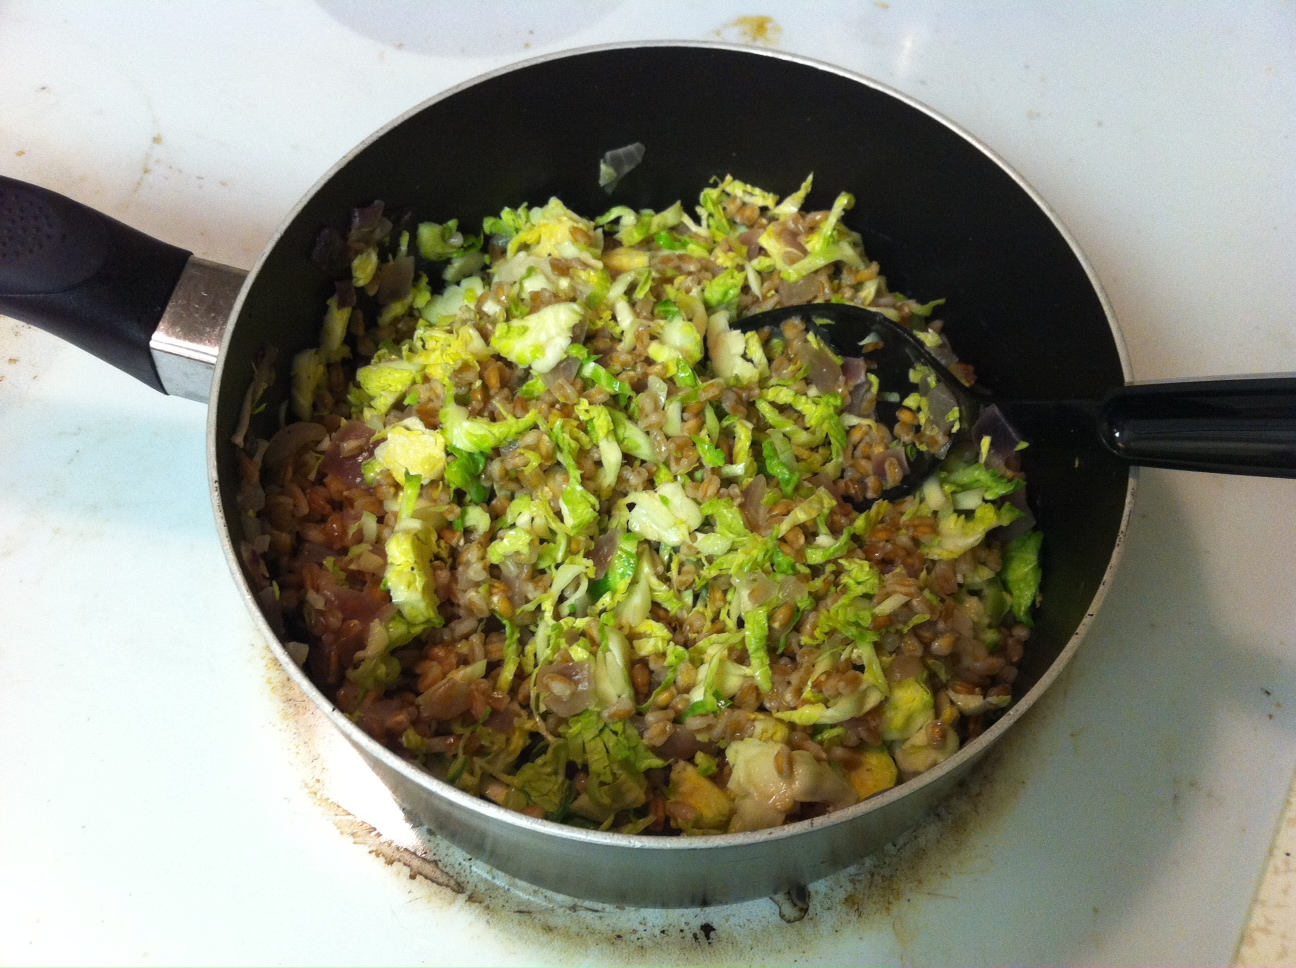
Next comes the curry paste and another round of veggies. This is why it’s such a deliciously, nutrient-dense meal.

photo 2 (3)

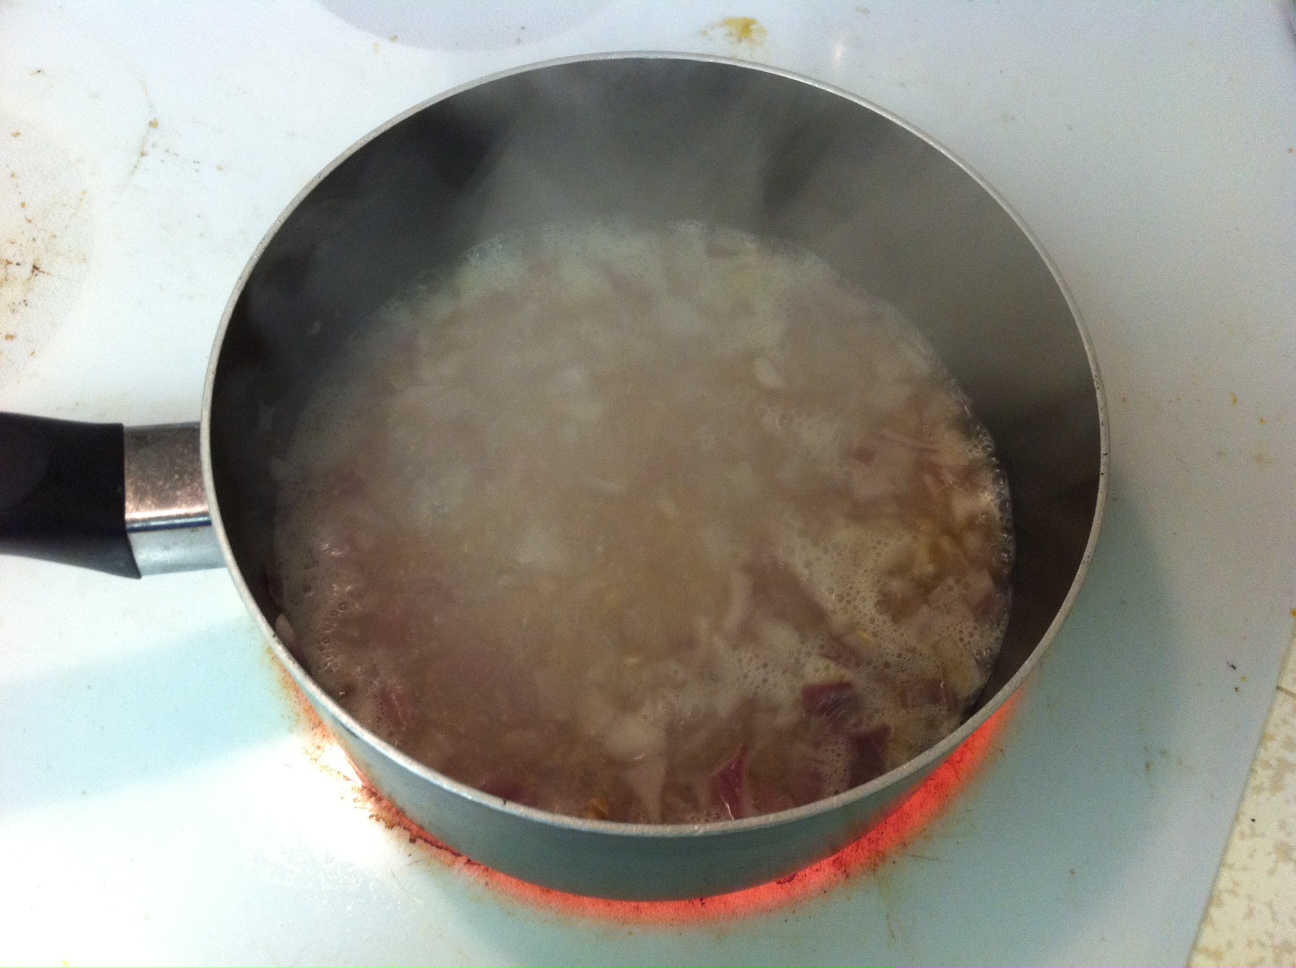
After you add the peanut butter is when the magic starts to happen…

photo 3 (2)

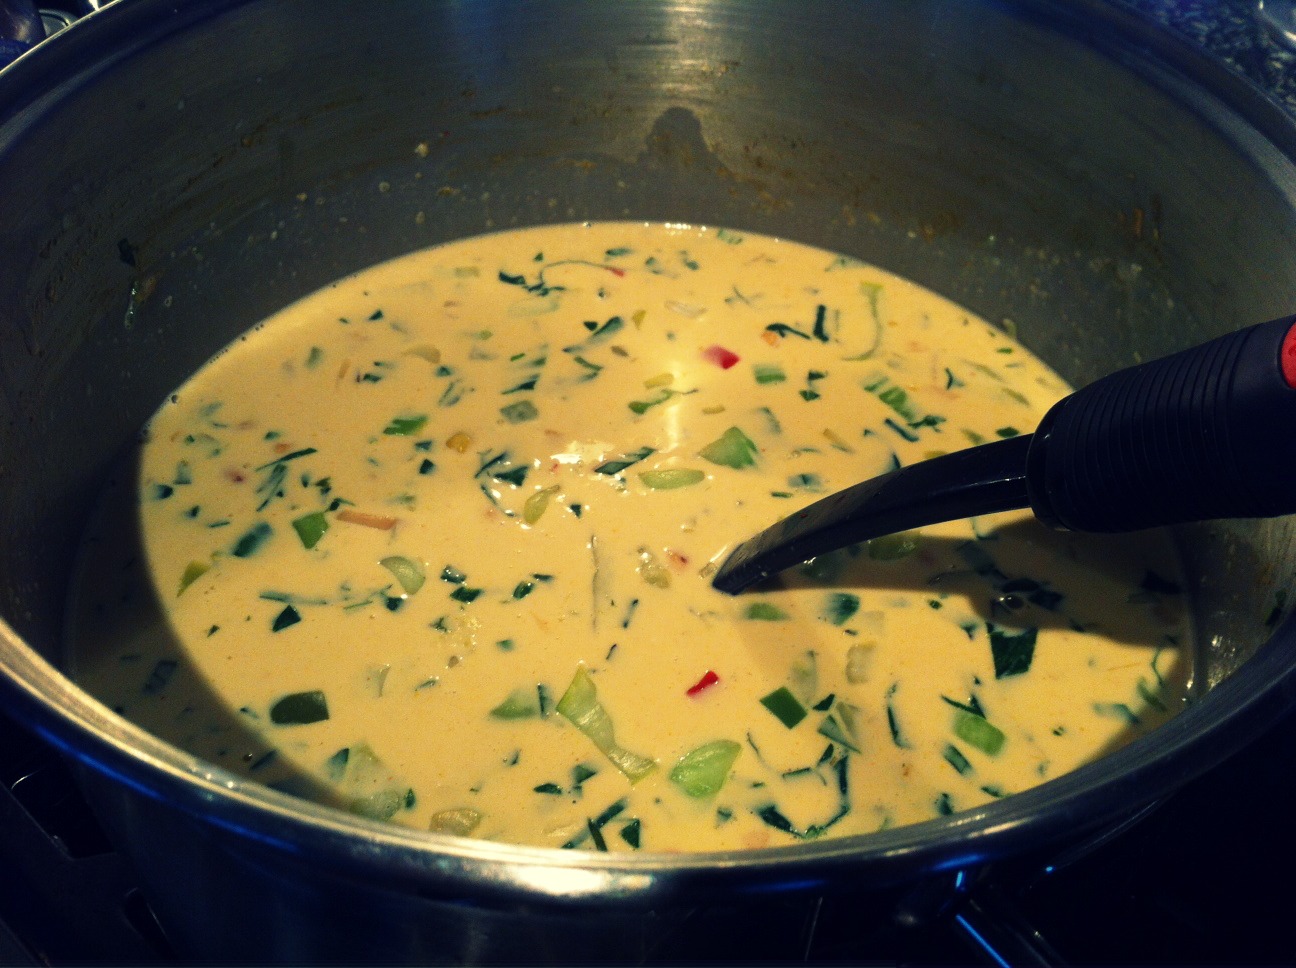
A little coconut milk, and you’ve got yourself a curry!

photo 4 (1)

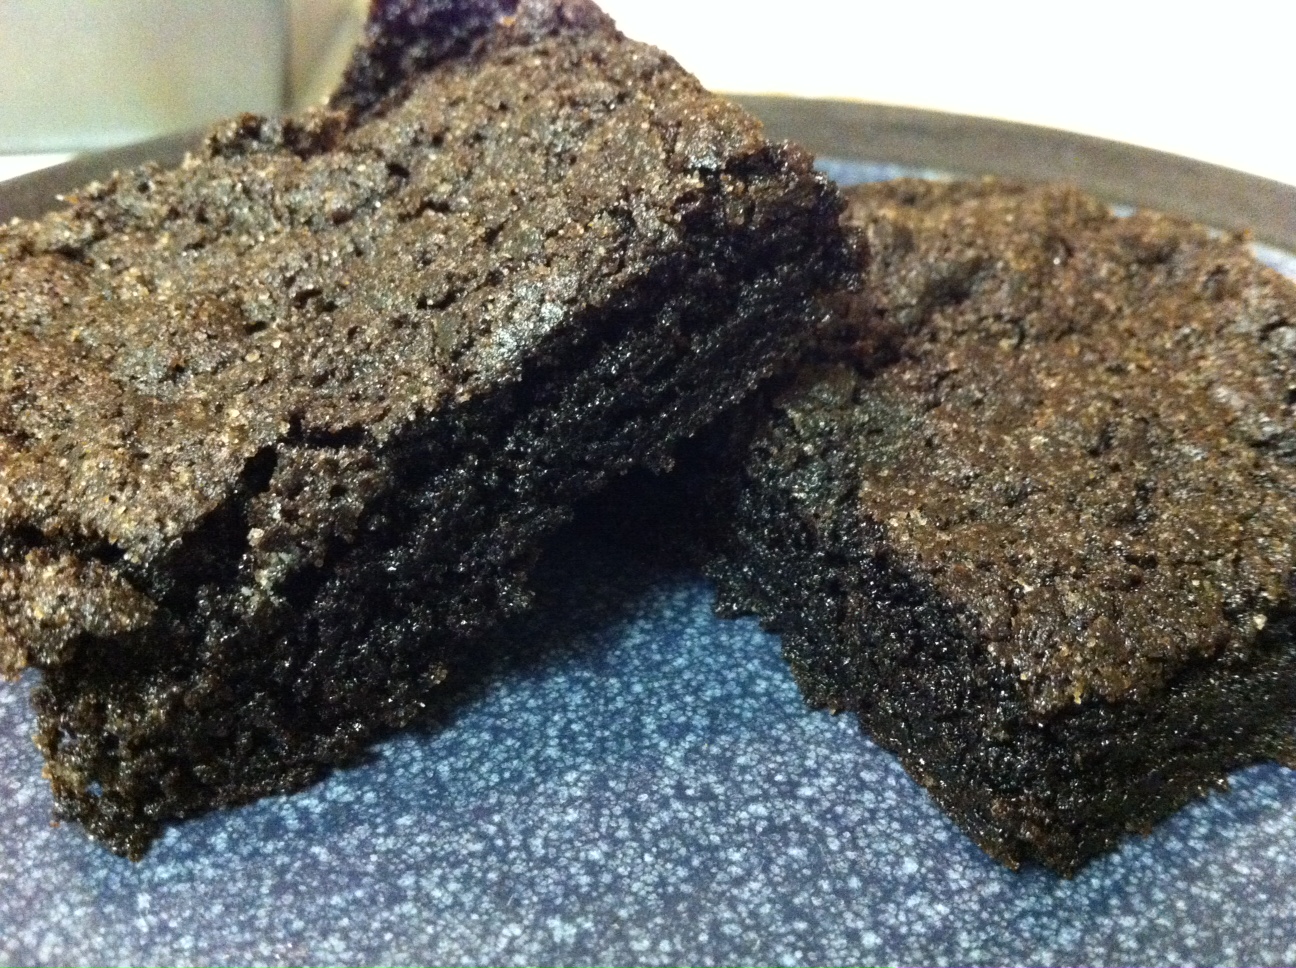
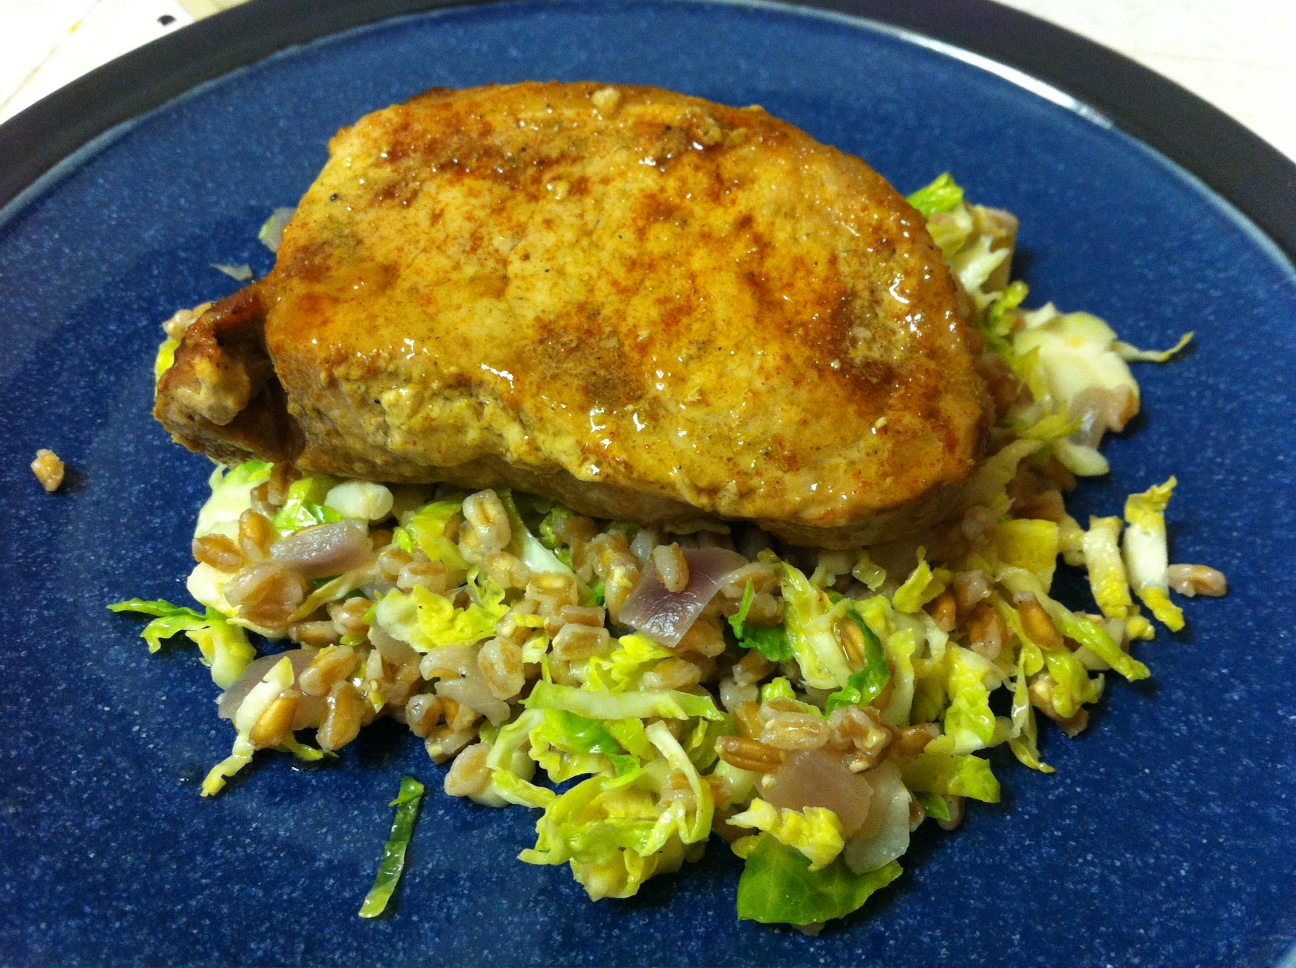
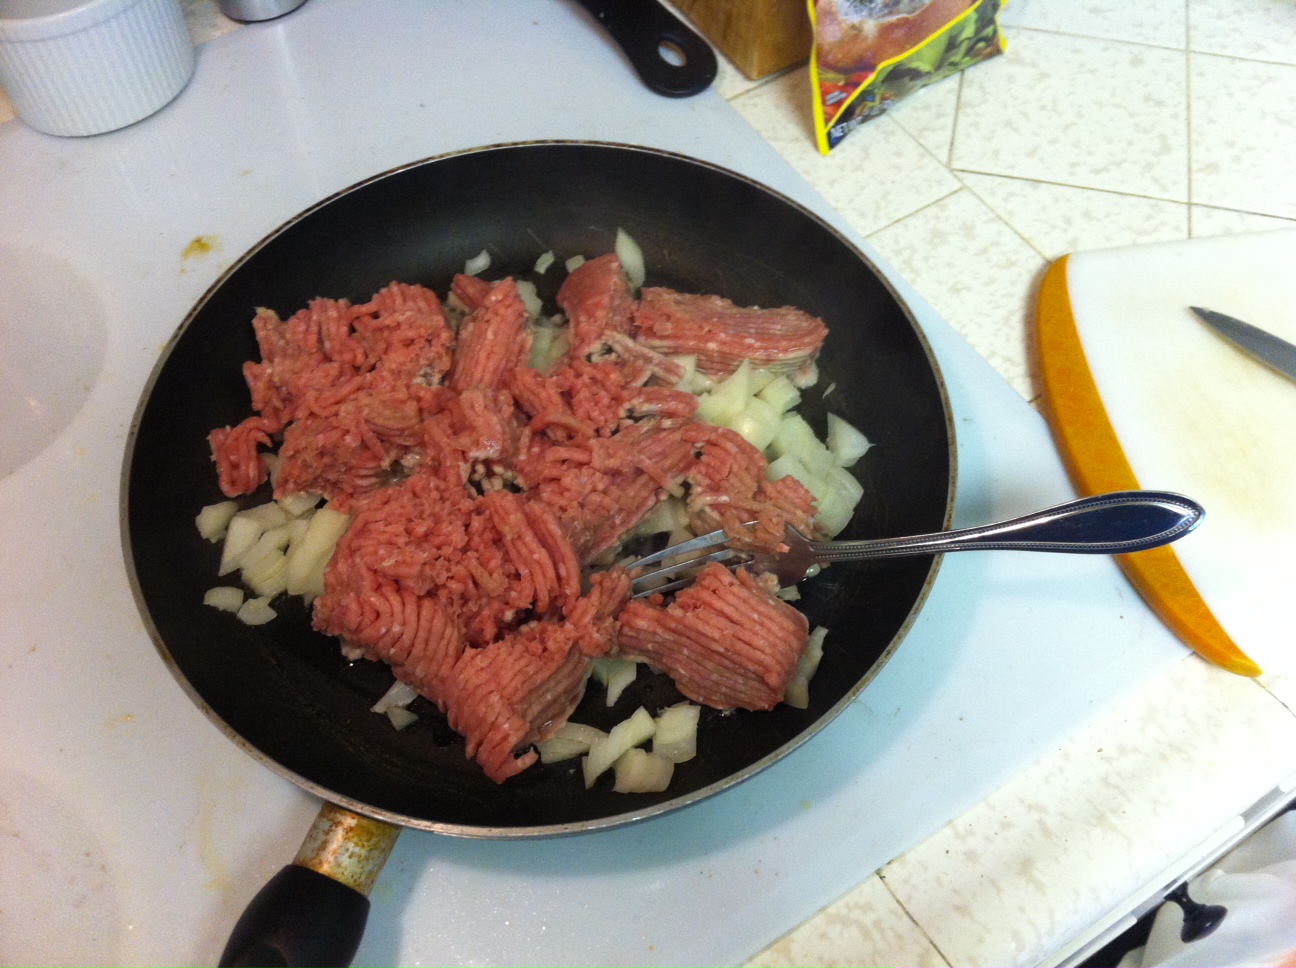
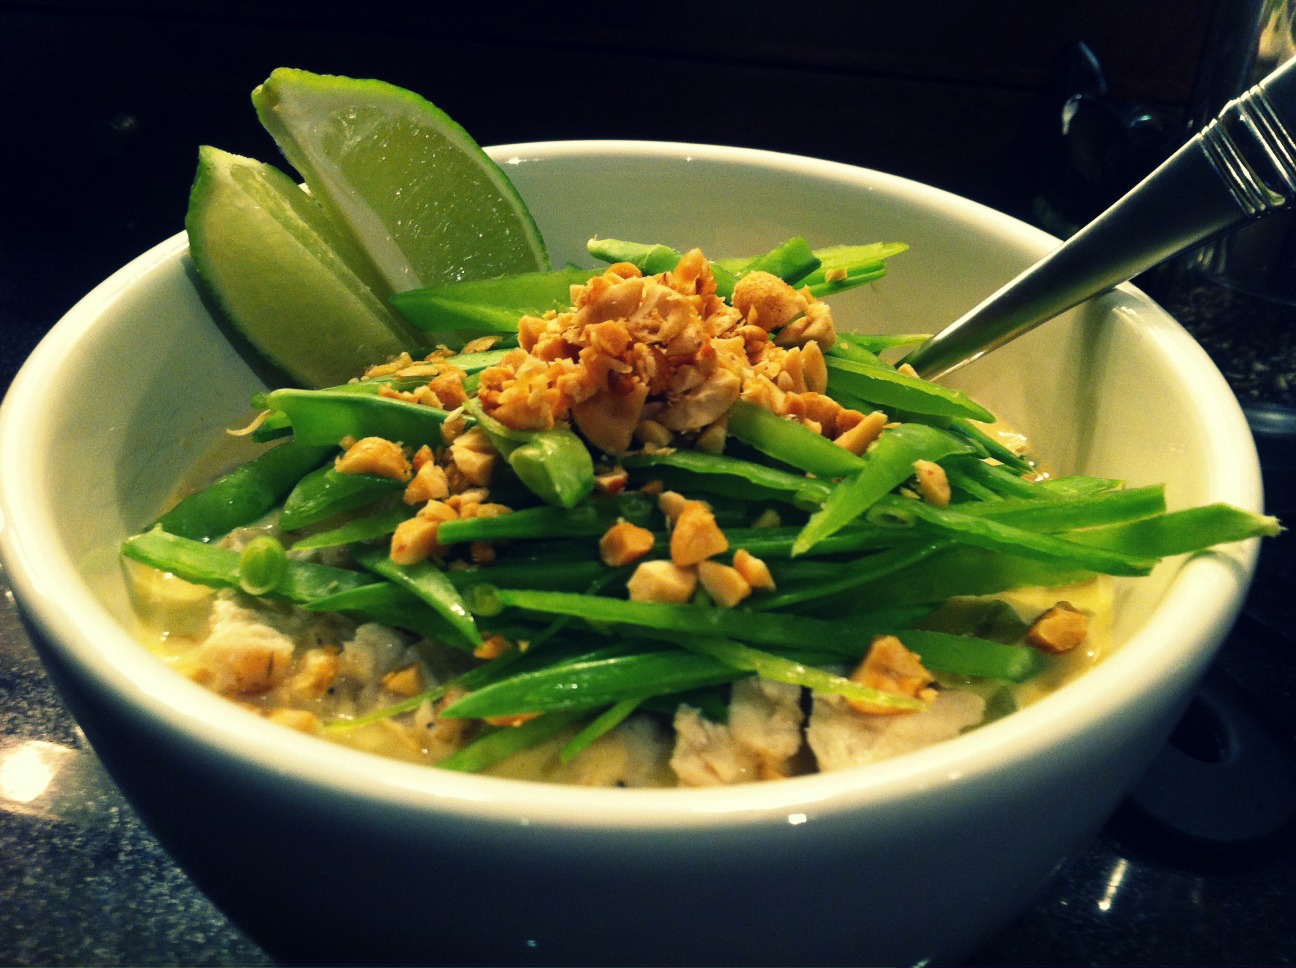
Once the rice is done, you’re ready to plate the meal; we added some chicken for extra protein, too.

photo 1 (4)

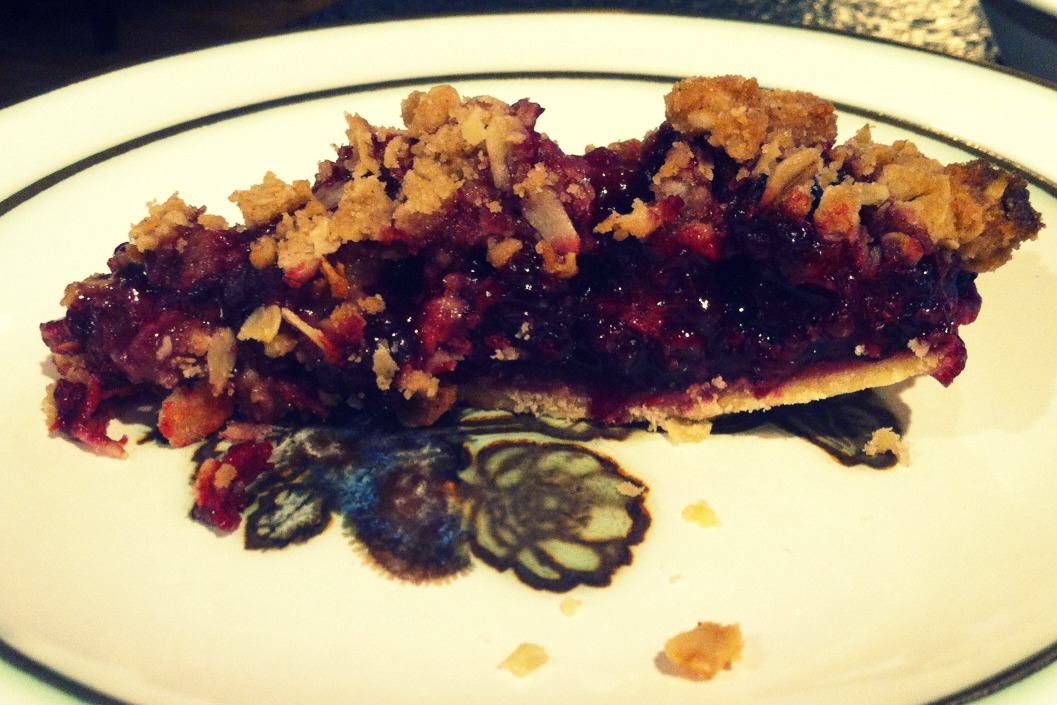
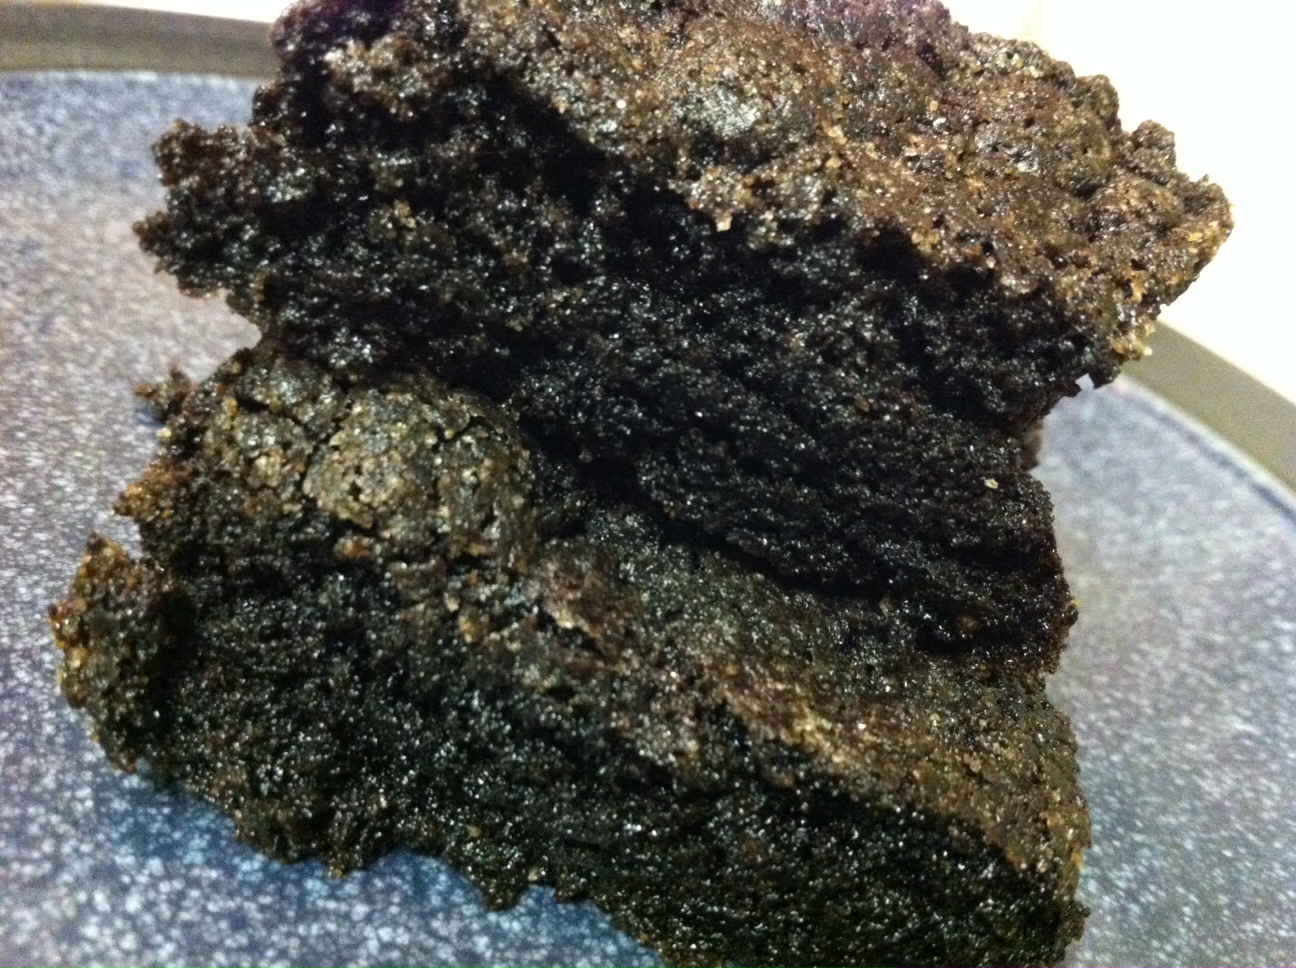
Yes, it’s as good as it looks. Especially if you’re already a curry fan, this recipe will not disappoint.

photo 2 (4)

For other awesome plant-based recipes, check out the Thrive Energy Cookbook here

Recipe: Best-Ever Blackberry Pie

photo 1 (2)

Hubby traditionally requests a birthday pie instead of a cake, and I always thought it was a little odd. Until now.

Oregon’s blackberries are in season, and these little gems are tangy, sweet and downright addictive. Every so often we’ll walk (or run) by a bush and get a whiff of ripened berries, so it was a no-brainer to pick them fresh and use them in this year’s celebratory pie.

I Googled around for what looked like a winning recipe, then made a few tweaks for what turned out to be a new family favorite.

KineticFix’s Best-Ever Blackberry Pie

Adapted from Not Derby Pie’s recipe.

Ingredients: 

  • 6 cups blackberries, rinsed, picked clean and patted dry
  • 1/2 cup sugar
  • 1 tsp lemon juice
  • 1 tsp lemon zest
  • 1/2 tsp cinnamon
  • 1/8 tsp nutmeg
  • 1/2 tsp vanilla extract
  • 3 Tbsp tapioca flour
  • 1 cup flour
  • 1 cup brown sugar
  • 1/4 cup butter
  • 1/4 cup dry oatmeal
  • 1/2 tsp cinnamon
  • 1/4 tsp nutmeg
  • Pie crust (I used a pre-made frozen one to cut time!)

Directions: 

  1. Preheat oven to 400 degrees.
  2. Put blackberries, sugar, lemon juice and zest, cinnamon, nutmeg, vanilla and tapioca flour into a large bowl. Toss gently to coat berries evenly, and leave to macerate for 20 minutes.
  3. While the berries are hanging out, prepare the crumb topping. Add flour, brown sugar, oatmeal, cinnamon and nutmeg to a medium bowl. Cut butter into cubes and add, mixing with hands until the mixture resembles wet sand.
  4. Spoon blackberries into bottom crust. Sprinkle crumb topping evenly over the top of the pie.
  5. Set the pie on a baking sheet lined with foil, and bake for 30 minutes. Reduce heat to 350 degrees, and bake another 30-35 minutes, until juices are bubbling and crumb topping is browned. Let cool at least 30 minutes before eating.

And, as NDP says, “serve with vanilla ice cream, for the win.” Fantastic!

photo 2 (14)

Recipe: Thrive Energy Cookbook’s black bean, sweet corn & mango salsa

photo 4 (1)

While I’m no vegetarian, I do make an effort to incorporate plant-based, nutrient-dense, whole-food recipes into my meal planning.

Why? Well, as much as I love a good steak, I can feel my body processing it for hours on end; sometimes it’s nice to eat stuff that’s less intensive to digest, which means you’ll have more overall energy.

That’s why I was excited about checking out the new Thrive Energy Cookbook from Brendan Brazier (former pro triathlete, ultramarathon champ, creator of Vega). His purpose-driven recipes are intended to fuel performance.

This salsa, for example, is a twist on the southwestern classic. Bursting with flavor — and protein — it’s perfect over veggies, atop a salad or (my favorite) with chicken or fish.

Thrive Energy Cookbook’s Black Bean, Sweet Corn & Mango Salsa

Ingredients:

  • 1 cup (or rinsed canned) black beans
  • 1 cup peeled and diced mango
  • 1 cup fresh sweet corn kernels (from 2 cobs)
  • 1/4 cup finely-diced red onion
  • Handful of fresh cilantro leaves, torn
  • 3-4 fresh mint leaves, thinly sliced
  • 2 tbsp freshly-squeezed lime juice
  • 1 tbsp avocado or hemp oil
  • 1 tsp agave nectar
  • Sea salt and freshly-ground black pepper, to taste

Directions:

  1. In a large bowl, combine all ingredients.
  2. Toss well. Best served immediately.

First, gather all the ingredients — note: I substituted olive oil for the avocado/hemp oil, though, and used the whole can of beans.

photo 2 (3)

Want a trick for dicing up those tough-to-handle mangos? Slice ’em, score ’em, then flip ’em inside out and scrape out the chunks. Easy!

photo 3 (2)

Since Hubby and I are big cilantro fans, I added a bit more than the recipe called for, too.

photo 4 (2)

Look at all that awesome color! It’s a perfect pairing for quick meal on hot summer days.

photo 1 (2)

A quick stir, and you’re done — eat alone, with veggies, or spoon over grilled chicken or fish for a heartier, non-vegetarian meal.

photo 2 (2)

I’ll be sharing more recipes as I experiment with the book, but if you’d like to check out other plant-based options in the meantime, visit the Thrive Forward recipe center for more information.

Recipe: My very favorite salad dressing

photo 4 (1)

Sometimes the best recipes come out of necessity.

Case in point: When you buy all the fixings for a beautiful salad, but forget the main ingredient that ties them all together.

The solution? Grab three basic ingredients, which are probably already in your pantry, and whip up this simple, delicious dressing.

photo 1 (1)

Experiment by adding garlic, spices or fancy mustards if you want to expand the flavor.

Or use it as a marinade for chicken or veggies next time you’re stumped for a new spin on the same old weeknight meals.

KineticFix’s Mustard Balsamic Vinaigrette

Ingredients: 

  • 1/2 cup extra virgin olive oil
  • 1/4 cup balsamic vinegar
  • 2-4 tablespoons of your favorite mustard

Directions: 

  1. Measure out olive oil and vinegar, adding both to a medium-sized bowl.
  2. Whisk in mustard slowly, using a fork to incorporate into oil and vinegar.
  3. Add as much as you prefer, tasting as you go (I usually stop when the dressing begins to thicken and emulsify — i.e. there’ s no more oil floating around).
  4. Drizzle over your favorite salad, and enjoy immediately!

Here’s how it looks before you add the mustard — the oil and vinegar will separate in the bowl.

photo 2 (1)

And after you whisk in the mustard, it should thicken up and take on a more even consistency.

photo 3 (2)

Have you stumbled upon a great recipe when having to improvise?

Recipe: Raspberry Mint Rice Balls

RiceBalls1

Allow me to introduce you to my new favorite training companion: the Feed Zone Portables cookbook. If you’re weary of processed bars and gels and the same old pasta, there’s a good chance it’ll soon become your BFF (that’s Best Fueling Friend), too.

After my ultra pacer Jamie had success with the rice cakes during her Born to Run 100-miler, I jumped aboard the bandwagon and tweaked one of the recipes for my own race. It worked perfectly — not only is the rice-based treat quickly-digestible, but its mild flavor is also easy on a tender mid-event tummy.

Raspberry Mint Rice Balls (adapted from Feed Zone Portables)

Ingredients:

  • 1 cup uncooked white rice
  • 2 1/4 cups water
  • 1/4 cup brown rice syrup
  • 1-2 tablespoons lemon juice (to taste)
  • 1 pint fresh raspberries
  • 2 tablespoons fresh mint leaves, minced
  • 1/4 cup finely-shredded unsweetened coconut
  • Aluminum foil, cut into small squares
  • Olive oil spray

Directions:

  1. Combine rice, water and a dash of salt in a rice cooker and let cook.
  2. When rice is finished cooking, transfer it to a large bowl and add brown rice syrup, lemon juice and coconut. Mix thoroughly.
  3. Coat hands in olive oil, and place a spoonful of rice in the palm of one hand. Place a raspberry and a sprinkle of mint on top of rice, and then place another spoonful of rice over that (to encase raspberry and mint in rice). Roll gently between palms to form a ball.
  4. Place ball on foil wrapper (also sprayed with olive oil) and seal tightly. When finished forming and wrapping balls, store them in the refrigerator.

A few tips: First, make sure you prep all the ingredients ahead of time because forming the balls can get messy!

Although the book calls for flat “squares” or “cakes,” Jamie and I found that the balls are quicker to make. Plus, they tend to get squished around in your bento box or hydration pack anyway.

RiceBalls2

Second, I did experience some trouble with the foil wrapper disintegrating during my trail race, which I attribute to the acidity of the lemon juice.

Next time, I may just try leaving it out, or I’ll look for an alternative wrapper (wax?) if I want to keep that nice citrus ‘bite.’

RiceBalls3

The balls held up great, though, despite getting jostled around over the course of six-plus hours in my hydration pack on a hot day.

And the fresh fruity/minty flavor was a welcome change from the heavy nut butters I’m usually consuming, so I’ll definitely be relying on them again.

RiceBalls4

Finally, I try to make them the day or evening before my race. Sure, it’s a little bit of last-minute race prep work, but it ensures that the fruit is at its freshest and that the rice stays nice and sticky for when you want to pop one (or 10) during your race. Bon appétit!

What’s your go-to fuel for training and racing? 

Recipe: The infamous “Salty Balls”


SB1

Training for an endurance event takes more than just physical conditioning; proper fueling can make or break your race.

But finding success can take some trial and error, so I’m always on the lookout for new recipes and recommendations.

Which is why I was pumped when pro triathlete and fellow Coeur Sports athlete Hailey Manning shared her secret recipe for the famous Salty Balls that she uses as her bike nutrition during Ironman races.

The recipe was developed by Stacy Sims, chief research officer and a co-founder of Osmo Nutrition, and both Hubby and I have been eating ’em nonstop on runs and rides.

See my take on the treat below!

Hailey Manning’s Salty Balls

Ingredients:

  • 1/2 cup natural peanut butter (or any kind of nut butter)
  • 1/3 cup brown rice syrup (I ordered this kind from Amazon)
  • 1/2 cup whey protein isolate (I used half vanilla-flavored powder, plus half Osmo Acute Recovery for some spice)
  • 1/2 cup dry oatmeal
  • 1/4 cup shredded coconut

Directions:

  1. Combine all ingredients. If you need a bit more holding power, add a dash of protein powder.
  2. Throw a sprinkle of salt on top and freeze until needed (makes ~10 balls, ~140kcal/ball).

Here’s a look at the process, starting with all the ingredients (sorry, red wine is not one of ’em, although it is key to my performance in the kitchen!)…

SB2

First, add all the dry ingredients — this is both protein powders, plus the oatmeal.

SB3

Tip: Use a sturdy spoon after adding the peanut butter and brown rice syrup.

SB4

The mixture should be sticky, but not overly so; mine had the consistency of crumbly cookie dough.

SB5

Take small spoonfuls and roll into balls. Sprinkle with salt, or dip one whole side for more salty goodness, like I did here.

SB6

I store the balls in an airtight container in the freezer, then before a ride or run I pull a few out, wrap them individually and devour ’em within a few hours!

Thanks again to Hailey and Stacy for sharing this recipe. What are your favorite fuels for endurance events? 

Recipe: Bacon Maple Cornbread

CB2

Confession: This is a health- and fitness-focused blog, but I don’t eat kale 24/7 or work out like crazy every.single.day.

It’s simply not practical — or, let’s face it — fun. 

After all, it’s all about balance. And, friends, sometimes that balance comes in the form of bacon grease and maple syrup…enjoy!

Bacon Maple Cornbread

Ingredients:

  • 2 cups flour
  • 2 cups cornmeal
  • 1 egg
  • 4 teaspoons baking powder
  • 1 1/2 cups milk
  • 6 tablespoons maple syrup
  • ~1/2 cup bacon grease
  • Butter and honey, for spreading

Directions:

  1. Preheat oven to 400 degrees.
  2. Mix flour, cornmeal, egg, baking powder and 1 cup of the milk.
  3. Stir in maple syrup and bacon grease.
  4. Add in remainder of milk to get batter to the correct consistency — not runny, but not too thick.
  5. Pour batter into cake pan and bake until golden brown, about 45 minutes.
  6. Smother with butter and honey for a real treat 🙂

You can make individual muffins (bake for 15-20 minutes), but I prefer a larger pan to keep the cornbread from drying out.

CB1

It’s got a nice smoky flavor from the bacon and a natural sweetness from the maple syrup. The perfect accompaniment to some good BBQ…but that’s another post entirely!

CB3

How do you define balance when it comes to working out and eating healthy? 

Recipe: Butterless Mocha Protein Brownies

photo 4 (2)

Here’s a little baking math for you:

Brownie craving + no boxed mix + no butter + no motivation to go to the store = Using a little Google magic to improvise

Which led me to concocting the recipe below… Since I was swapping in oil for butter, I figured the coffee-flavored protein powder would A) deepen the chocolate flavor, and B) add some kind of healthy component.

The general verdict was that the texture was awesome — especially if you’re a fan of super-chewy brownies — but they were a little on the greasy side. So I’ll make ’em again, but go easier on the oil next time!

Butterless Mocha Protein Brownies

Ingredients: 

  • 1/3 cup vegetable oil
  • 1 cup sugar
  • 1 1/2 tsp. pure vanilla extract
  • 1 egg
  • 1/2 cup all-purpose flour
  • 1/3 cup cocoa powder
  • 1 tbsp. coffee-flavored protein powder (I used JavaPro)
  • 1/4 tsp. baking powder
  • 1/4 tsp. salt

Directions: 

  1. Preheat oven to 350 degrees and line a 10″ loaf pan with parchment paper.
  2. Mix oil and sugar in a large bowl. Incorporate vanilla and egg.
  3. In a separate bowl, whisk together flour, cocoa, protein powder, baking powder and salt.
  4. Add dry ingredients to wet, mixing thoroughly. Pour mixture into prepared pan.
  5. Bake 20-25 minutes, until a toothpick inserted into the center comes out with just a few crumbs. Cool completely before cutting.

As mentioned, I noticed that the batter was a bit oily, so I some off the top with a paper towel. Next time I’ll start with 1/4 cup oil and add more only as needed.

photo 1 (5)

Don’t worry if the batter isn’t too runny; mine had the consistency of cookie dough, so I simply scooped it out of the bowl and patted it into the pan.

photo 2 (5)

The result? Moist, chewy brownies with a decadent texture. Not too bad for an evening experiment in the kitchen!

photo 3 (4)

Have you had success with recipes when improvising ingredients? 

Recipe: Citrus-Cumin Pork Chops with Farro

photo 2 (4)

Oh, farro. You’re an ancient grain with a bad rap for being tricky to cook, but your nutty flavor, delicate chew and versatility make you worth a second look.

This is precisely why I went off Googling recipes when I found a package of it while cleaning out our kitchen cupboard recently.

Here’s a time-saving tip: Knock out the farro salad while the pork is cooking in the oven, and you’ll have a delicious dinner on the table in just about an hour.

Citrus-Cumin Pork Chops with Farro 

(Recipe adapted from Food Network Kitchen)

Ingredients: 

  • 2 tsp ground cumin
  • 2 tsp paprika
  • Salt and pepper, to taste
  • 4 pork chops
  • 2 tbsp honey
  • Juice of one orange
  • 2 tbsp olive oil
  • 1/2 medium red onion, chopped
  • 1 cup farro
  • 2 1/4 cups water
  • 1 tsp salt
  • 10 oz Brussels sprouts, trimmed and thinly sliced

Directions: 

  1. Preheat oven to 375 degrees
  2. Season pork chops on both sides with cumin, paprika, salt and pepper. Place in baking dish.
  3. Drizzle with honey and orange juice, and place in oven to bake for 30 mins.
  4. Meanwhile, heat olive oil in saucepan and add red onion. Stir for 5 mins
  5. Add farro, water and salt and bring to a boil. Reduce heat and simmer until tender, about 25 mins.
  6. After oven timer has gone off, flip pork chops and bake for another 30 mins
  7. After farro is tender, stir in Brussels sprouts and cook until tender, another 5 mins
  8. Dish farro mixture equally onto 4 plates, top with a pork chop and drizzle with pan juices.

Here’s a look at the process: Start by sautéing onion in the pan with olive oil.

photo 1 (3)

Be sure to buy the semi-pearled farro variety, meaning it cooks up quickly, and without any pre-soaking, in about 25 minutes.

photo 2 (3)

Bring water to a boil, then reduce heat and simmer until grains are tender.

photo 3 (3)

The Brussels sprouts add some nice spice — plus they’e a great way to sneak some greens into your meal.

photo 4 (1)

The warmth from the farro will help soften the sprouts, so you’ll only need to cook them for a few minutes.

photo 1 (4)

Once the pork is done, plate it over a bed of the farro mixture and drizzle pan juices over the entire plate for extra flavor.

photo 2 (4)

What other off-the-beaten-path ingredients do you enjoying incorporating into meals? 

Recipe: Stuffed Peppers with Turkey and Rice

couscous-stuffed-peppers-af1

It’s easy to get in a dinner rut, so I’ve been scouring my old cookbook in search of long-forgotten recipes to add back into our nightly rotation.

This one is a family favorite — not only because it’s delicious, but also because it’s a super-simple one-pan, one-dish meal that can be made in a little over an hour.

One tip: If you want to further shorten the prep time, try buying quick rice or using a pre-made version in a pinch…although Hubby and I usually go the rice-cooker route to keep from using too many processed ingredients, especially with the vegetable mix being pretty high in sodium.

Stuffed Peppers with Turkey and Rice

Ingredients: 

  • 2 tablespoons olive oil
  • 1 medium yellow onion, minced
  • 1 pound ground turkey
  • 1 package Knorr vegetable recipe mix
  • 1 cup brown rice, cooked in rice cooker
  • 5 bell peppers, hollowed out from the top

Directions: 

  1. Preheat oven to 350 degrees.
  2. Pour olive oil into pan over medium heat. Add onion, and cook until slightly translucent.
  3. Add ground turkey to onion, stirring  to break up and cook through.
  4. Add Knorr mix and brown rice to cooked turkey, stirring to incorporate.
  5. Line a baking dish with parchment paper, placing hollowed-out peppers in it.
  6. Fill peppers evenly with meat/rice mixture.
  7. Bake uncovered for 60 minutes, or until peppers are tender.
  8. Allow to set/cool 10-15 minutes before serving.

Here’s a look at the process:

photo 1

Cook the onion and turkey before pouring the Knorr vegetable seasoning packet into the pan.

photo 2

Add rice too cooked meat mixture, and stir to incorporate all ingredients evenly.

photo 3

Remove the pepper tops (keeping bottoms intact), and scoop out the core and seeds before placing peppers in baking dish.

photo 1 (1)

Distribute meat mixture among peppers, taking care not to over-fill.

photo 2 (1)

Once cooked, the peppers soften up and their skin will start to slightly wrinkle.

photo 3 (1)

Serve with a side veggie, or alone for an easy, healthy dinner in a matter of minutes. Enjoy!